Woocommerce hook custom button on admin order page

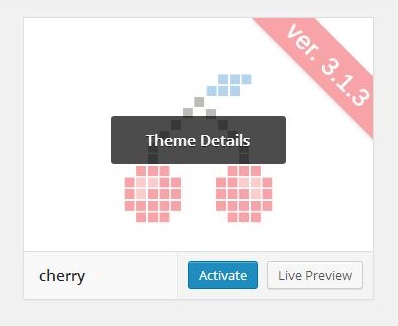
Another Woocommerce hook that i search high and low for it but in the end dig it out from the source code itself. What happen if you would like to create a custom button on Woocommerce admin order page? Something like the image below?

Screen Shot 2015-09-16 at 7.42.19 PM

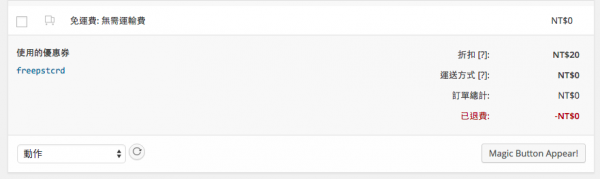
Looks like something you need? It's pretty easy by using a hook call 'woocommerce_order_item_add_action_buttons'.

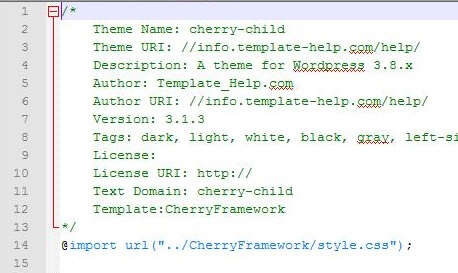
woocommerce_order_item_add_action_buttons woocommerce button hook

Basically this hook allows you to add custom button similar to the one woocommerce has and ensuring that you don't hack or edit the core code to get what you want. Here is a snippet of what i did.

// add new button for woocommerce
add_action( 'woocommerce_order_item_add_action_buttons', 'action_woocommerce_order_item_add_action_buttons', 10, 1);
// define the woocommerce_order_item_add_action_buttons callback
function action_woocommerce_order_item_add_action_buttons( $order )
{
    echo '<button type="button" onclick="document.post.submit();" class="button generate-items">' . __( 'Magic Button Appear!', 'hungred' ) . '</button>';
    // indicate its taopix order generator button
    echo '<input type="hidden" value="1" name="renew_order" />';
};
// resubmit renew order handler
add_action('save_post', 'renew_save_again', 10, 3);
function renew_save_again($post_id, $post, $update){
    $slug = 'shop_order';
    if(is_admin()){
            // If this isn't a 'woocommercer order' post, don't update it.
            if ( $slug != $post->post_type ) {
                    return;
            }
            if(isset($_POST['renew_order']) && $_POST['renew_order']){
                    // do your stuff here after you hit submit
                }
    }
}

dump the above snippet to your function.php file and you should see the "magic button appear!" button on your woocommerce admin order page.

A little bit of explanation here, what the above code does it create a button which the woocommerce_order_item_add_action_buttons hook does the trick

// add new button for woocommerce
add_action( 'woocommerce_order_item_add_action_buttons', 'action_woocommerce_order_item_add_action_buttons', 10, 1);
// define the woocommerce_order_item_add_action_buttons callback
function action_woocommerce_order_item_add_action_buttons( $order )
{
    echo '<button type="button" onclick="document.post.submit();" class="button generate-items">' . __( 'Magic Button Appear!', 'hungred' ) . '</button>';
    // indicate its taopix order generator button
    echo '<input type="hidden" value="1" name="renew_order" />';
};

I've place a hidden button to identify the submit is hit from this button. Next, since woocommerce admin order page is also a post page, all i have to do is to attached it with a post handler hook.

// resubmit renew order handler
add_action('save_post', 'renew_save_again', 10, 3);
function renew_save_again($post_id, $post, $update){
    $slug = 'shop_order';
    if(is_admin()){
            // If this isn't a 'woocommercer order' post, don't update it.
            if ( $slug != $post->post_type ) {
                    return;
            }
            if(isset($_POST['renew_order']) && $_POST['renew_order']){
                    // do your stuff here after you hit submit
                }
    }
}

and make sure that this handle only runs if its a shop_order type and we are good to go! That's all! Enjoy!

Easy Setup OpenVPN in 5 minutes with Debian or Centos or Ubuntu

Ok, i bet some times you will want to setup OpenVPN real quick in less than 5 minutes but have to go through with a lot of instruction and it might not work! Especially if you are on a VPS! Now let me explain how i did it in 5 minutes thanks to Nyr. If you are installing this on an OpenVZ machine, please update your host file as instructed at the bottom of this article, if you are not, just continue reading by firing up a VPS machine or a physical machine and fire the following instruction.


wget git.io/vpn --no-check-certificate -O ~/openvpn-install.sh; bash openvpn-install.sh

regardless of Debian, Centos or Ubuntu, this will work fine! Now, the script will ask you a few questions and starts installing

Welcome to this quick OpenVPN "road warrior" installer

I need to ask you a few questions before starting the setup
You can leave the default options and just press enter if you are ok with them

First I need to know the IPv4 address of the network interface you want OpenVPN
listening to.
IP address: 192.168.100.99

What port do you want for OpenVPN?
Port: 1194

Do you want OpenVPN to be available at port 53 too?
This can be useful to connect under restrictive networks
Listen at port 53 [y/n]: y

Do you want to enable internal networking for the VPN?
This can allow VPN clients to communicate between them
Allow internal networking [y/n]: y

What DNS do you want to use with the VPN?
   1) Current system resolvers
   2) OpenDNS
   3) Level 3
   4) NTT
   5) Hurricane Electric
   6) Yandex
DNS [1-6]: 2

Finally, tell me your name for the client cert
Please, use one word only, no special characters
Client name: example

I am installing OpenVPN in a OpenVZ machine. Therefore, i am throwing in the private ip of the machine instead of the public ones. Once the script finish installing and setup, it will ask you the following questions,

If your server is NATed (LowEndSpirit), I need to know the external IP
If that's not the case, just ignore this and leave the next field blank
External IP: 23.132.16.23

Finished!

Your client config is available at ~/cluster.ovpn
If you want to add more clients, you simply need to run this script another time!

And you will get a user ovpn file to install it into your computer! Now, if you would like to add more user, do the following

bash ~/openvpn-install.sh

and you will see the following screen.

Looks like OpenVPN is already installed
What do you want to do?

1) Add a cert for a new user
2) Revoke existing user cert
3) Remove OpenVPN
4) Exit

Select an option [1-4]:

This is specially easy for anyone to just setup your OpenVPN machine in less than 5 minutes and furthermore, you can easily config more users using the same old script. Pretty neat stuff if you asked me!

Installing OpenVPN in OpenVZ

Now, there are a few more things to do if you are in an OpenVZ, on the host machine, you might want to add the following criteria so that iptables is available and internet is forwarding to your client.

at the bottom of /etc/vz/vz.conf you will see the following configuration

## Defaults for containers
VE_ROOT=/var/lib/vz/root/$VEID
VE_PRIVATE=/var/lib/vz/private/$VEID

## Filesystem layout for new CTs: either simfs (default) or ploop
#VE_LAYOUT=ploop

## Load vzwdog module
VZWDOG="no"

## IPv4 iptables kernel modules to be enabled in CTs by default
IPTABLES="ipt_REJECT ipt_tos ipt_limit ipt_multiport iptable_filter iptable_mangle ipt_TCPMSS ipt_tcpmss ipt_ttl ipt_length"
## IPv4 iptables kernel modules to be loaded by init.d/vz script
IPTABLES_MODULES="$IPTABLES"

## Enable IPv6
IPV6="yes"

## IPv6 ip6tables kernel modules
IP6TABLES="ip6_tables ip6table_filter ip6table_mangle ip6t_REJECT"

change it to the following

## Defaults for containers
VE_ROOT=/var/lib/vz/root/$VEID
VE_PRIVATE=/var/lib/vz/private/$VEID

## Filesystem layout for new CTs: either simfs (default) or ploop
#VE_LAYOUT=ploop

## Load vzwdog module
VZWDOG="no"

## IPv4 iptables kernel modules to be enabled in CTs by default
#IPTABLES="ipt_REDIRECT ipt_LOG ipt_state ipt_recent xt_connlimit ipt_owner iptable_nat ipt_REJECT ipt_tos ipt_limit ipt_multiport iptable_filter iptable_mangle ipt_TCPMSS ipt_tcpmss ipt_ttl ipt_length"
## IPv4 iptables kernel modules to be loaded by init.d/vz script
#IPTABLES_MODULES="$IPTABLES"

## Enable IPv6
#IPV6="yes"

## IPv6 ip6tables kernel modules
#IP6TABLES="ip6t_REDIRECT ip6t_REJECT ip6t_tos ip6t_limit ip6t_multiport ip6t_TCPMSS ip6t_tcpmss ip6t_ttl ip6t_length ip6t_LOG ip6t_state ip6t_recent xt_connlimit ip6t_owner ip6table_nat ip6_tables ip6table_filter ip6table_mangle ip6t_REJECT"

## IPv4 iptables kernel modules to be enabled in CTs by default
IPTABLES="ipt_REDIRECT ipt_owner ipt_recent iptable_filter iptable_mangle ipt_limit ipt_multiport ipt_tos ipt_TOS ipt_REJECT ipt_TCPMSS ipt_tcpmss ipt_ttl ipt_LOG ipt_length ip_conntrack ip_conntrack_ftp ip_conntrack_irc ipt_conntrack ipt_state ipt_helper iptable_nat ip_nat_ftp ip_nat_irc ipt_state iptable_nat"
## IPv4 iptables kernel modules to be loaded by init.d/vz script
IPTABLES_MODULES="$IPTABLES"

## Enable IPv6
IPV6="yes"

## IPv6 ip6tables kernel modules
IP6TABLES="ip6_tables ip6table_filter ip6table_mangle ip6t_REJECT"
SKIP_SYSCTL_SETUP=yes

and make sure ip forward is enable by going to /etc/sysctl.conf and update the following to '1'

# Uncomment the next line to enable packet forwarding for IPv4
net.ipv4.ip_forward=1
net.ipv4.conf.default.forwarding=1
net.ipv4.conf.all.forwarding=1

and make sure Tun/TAP is enable for your VPS

# cat /dev/net/tun
cat: /dev/net/tun: File descriptor in bad state

If you are not seeing the above, do the following on your host machine,

vzctl set 101 --devnodes net/tun:rw --save
vzctl set 101 --devices c:10:200:rw --save 
vzctl stop 101 
vzctl set 101 --capability net_admin:on --save
vzctl start 101 
vzctl exec 101 mkdir -p /dev/net
vzctl exec 101 chmod 600 /dev/net/tun

Once you've done the above, then starts installing OpenVPN with the scripts by Nyr.

**UPDATE**
And remember to port forward port 1194 and 53!

-A PREROUTING -i vmbr1 -p tcp -m tcp --dport 53 -j DNAT --to-destination 192.168.100.2:53
-A PREROUTING -i vmbr1 -p udp -m udp --dport 1194 -j DNAT --to-destination 192.168.100.2:1194
-A PREROUTING -i vmbr1 -p tcp -m tcp --dport 1194 -j DNAT --to-destination 192.168.100.2:1194

Lesson 1:How to create a theme using cherry framework

Introduce cherry framework

Cherry is a new framework for WordPress that make it easier for users to build WorldPress themes and WordPress websites. It is a new software framework with most current and sensible approaches to produce a consistent and well-crafted website. Cherry Framework is used in WordPress to build a theme which able to call Cherry WordPress themes.

Why use cherry framework

It is a framework created by developers for developers, but it’s also a perfect solution for anyone who wants to build WordPress sites minimum time. The reason to use Cherry Framework is because themes are easy to install and all changes can be done in the WordPress admin area. There's no need to switch between WordPress, FTP or PhpMyAdmin and you can get thing done simply in WordPress admin also. Other than that, it also allows an easy way to install WordPress plugin.

In the WordPress dashboard is only have one personal dashboard experiences, but in the Cherry Framework contain an additional category called as Cherry Options. The new category has a stylized interface and brings much better overview on WordPress themes. It is contains 100+ handy options integrated into a framework with including easy adjust theme appearance, change typography, logo and navigation so on. Intuitively fine-tune slider, blog pages, portfolio and page footer so that everything appears in the style you prefer.

Installing cherry framework

Framework Installation

There are several steps to teach users how to install the Cherry Framework into WordPress:

Step 1: Go to Dashboard and select the Appearance > Themes > Install Themes. Here you should upload the file named [CherryFramework.zip] that you have download into your computer.

Step 2: After upload is finished, we are able to see the cherry icon in the Appearance > Themes page. Click Activate button to proceed.

Step 3: After the activation of cherry themes, select the Home logo and click Visit Site.

Step 4: The cherry original themes will appear in the current site. At the top you are able to see the Cherry Framework Logo.

Creating a Cherry Framework theme

To create a Cherry Framework theme, usually it will separate into two parts. Cherry Framework can define as a “base/starter” theme framework. It is a stand-alone theme designed to be a flexible foundation for quicker WordPress development, usually serving as a robust Parent theme for Child themes.

Child themes allow user to modify, or add to the functionality of that parent themes. A child theme is the safest and easiest way to modify an existing theme. If we use and modify existing themes (Cherry Framework), your changes will be lost since Cherry Framework updated. Therefore, we are suggesting creating a child theme and overriding within. When the Cherry Framework makes a few tiny changes or updates, the child theme was still keep your changes.

There are several steps to teach users how to create a Child theme and install into the WordPress:

How to create a Child Themes

Step 1: To create a child themes,we would recommend that you use a descriptive name such as “parenttheme-child” (where “parenttheme” is the name of your active theme). Inside the “parenttheme-child” folder >create a style.css, then we wrote the code on below:

You can change each of these lines to suit your theme name. The only required lines are the Theme Name, the Template, and (if the stylesheet of your child theme is being built off of the parent theme -- with a few modifications) the '@import url' line.

Child Themes Installation

Step 2: Again go to Appearance > Themes > Add new > Upload Themes and upload your “parenttheme-child” folder that you have created as a child theme;

Step 3: After upload is finished, go again Appearance > Themes. It will show the Cherry Framework and Child theme you have uploaded just now.

Step 4: Click to active the Child themes, select the Home logo and click Visit Site. (Please refer to Framework Installation step 3 methods). Then you are able to see your site.

Step 5: After the activation of cherry-child, the example output is show like below.

testtest

Step 6: In the Appearance > Themes, once you active the child theme you are able to see and use the cherry option function which is provided by Cherry Framework (Parent theme).

A child theme is a “drop-in” code library framework which is not a stand-alone Theme. Such frameworks cannot be installed or used as a stand-alone theme. Figure 1 below show if the WordPress have no any Parent Theme (Cherry Framework), the Child Theme (cherry-child) is unable to read also.

Figure 1: broken theme

Install the themes into WordPress via Server

You need access to your website via either FTP or your hosting provider’s file manager application (such as Filezilla), as it is easier to add and edit files and folders that way. Once you have logged into your website via your chosen FTP client, navigate to “/wp-content/themes/”.

This directory will contain one or more folders, each of which represents a theme installed on your site. Figure 2 show the example of using Filezilla:


Figure 2: File ascending order in FileZilla

Conclusion

This article is to introduce, analyzing and teach how to install the Cherry Framework into the WordPress. It also includes several steps of creating a child theme with override by Cherry Frameworks. Lastly, we have include how to install the child themes into WordPress. The installation method just like the method how to install a Cherry Framework.

The WordPress is a great Platform that uses to build blogs and sites. It also provides the infrastructure to create plugin frameworks or theme frameworks on top of it. The benefits of building theme frameworks are to provide a stable, good quality themes quick and short time. This helps in faster development time and lower costs.

WordPress: How to check widgets in dynamic sidebar

There are times when you need multiple dynamic sidebar on your WordPress blog. Espeically when you are trying to customized your WordPress into something more powerful. Creating multiple dynamic sidebar is as simple as writing the following code.

$loop = array('SIDEBAR 1', 'SIDEBAR 2', 'SIDEBAR 3', 'SIDEBAR 4','SIDEBAR 5');
foreach($loop as $item){
if ( !function_exists('dynamic_sidebar') || !dynamic_sidebar($item) )
	echo 'no dynamic sidebar';
}

With a sidebar registration logic in your theme functions.php such as below,

$loop = array('SIDEBAR 1', 'SIDEBAR 2', 'SIDEBAR 3', 'SIDEBAR 4','SIDEBAR 5');
foreach($loop as $item){
	register_sidebar( array(
		'name' => __( $item, 'example' ),
		'id' => $item,
		'description' => __( $item, 'example' ),
		'before_widget' => '<li id="%1$s" class="widget-container %2$s">',
		'after_widget' => '</li>',
		'before_title' => '<h3 class="widget-title">',
		'after_title' => '</h3>',
	) );
}

Everything looks good. You could customized the tag and title before your widget and title. Not until you find yourself having to customized your dynamic sidear with a customized before and after tag.

Adding Before and After Tag On Dynamic Sidebar

Well, its not that hard, just add it as follow and you will get your before and after tag for your sidebar!

$loop = array('SIDEBAR 1', 'SIDEBAR 2', 'SIDEBAR 3', 'SIDEBAR 4','SIDEBAR 5');

foreach($loop as $item){
echo '<div class="'.$item.'">';
if ( !function_exists('dynamic_sidebar') || !dynamic_sidebar($item) )
	echo 'no dynamic sidebar';
}
echo '</div>';

There! all our sidebars have its own wrapper! But i only want these wrapper if there are widget on it! erm...i guess i would need to check whether there is widget on it before i append the wrapper for each sidebar. How do i check whether a widget is used on a dynamic sidebar?

How to check widget is in used on a dynamic sidebar

The problem is simple, the solutions, you would have to dig a bit. The solutions that i managed to get my hand on was is_active_sidebar which tells us whether a particular sidebar contains a widget. Hence, we can perform our code as below,

$loop = array('SIDEBAR 1', 'SIDEBAR 2', 'SIDEBAR 3', 'SIDEBAR 4','SIDEBAR 5');
foreach($loop as $item){
if (is_active_sidebar($item) ){
	echo '<div class="'.$item.'">';
	dynamic_sidebar( $item ); 
	echo '</div>';
}

the above code will determine whether a particular sidebar is active (contain a widget), if it does contain a widget, we can add a wrapper before and after the dynamic sidebar and populate out the contain of this dynamic sidebar within the wrapper tag. For those which doesn't have any widget, we will simply ignore it.

is_active_sidebar doesn't work!

Well, it really doesn't work that is why there is an article from me. ha ha ha. It is actually a small bug in this particular function provided by WordPress. (can't bother to report so i write it out instead) If you look closely into the core code of is_active_sidebar, you will notice that if you pass it either lowercase or index number into this method, you will find that it works perfectly fine. However, if you pass in an uppercase as shown on my example, you will face this problem. The reason is that the method will sanitize the text you provide and this cause your string to go lowercase whereas the sidebar that you have registered was an uppercase. Therefore, it fail. What you have to do is either lowercase your sidebar names or create a logic that lowercase it for you.

Hope it helps someone out there 🙂

Boot Ubuntu USB Drive in Virtual Box on Windows Environment

Recently i got my hand on a Ubuntu USB installation drive from my friend. I was excited to get this Ubuntu into my Virtual Box but found out that the virtual box doesn't seems to like USB drive very much and only wants ISO or CD copies! I finally manage to get this thing work after some try and so i decided to write this down in case i want to do such stupid thing again.

Environment

Before is starts let's look at my environment.

  1. Windows 7
  2. Virtual Box v3.2.12
  3. Ubuntu 10.10

I think that's about it.

Physical Disk on Virtual Box

Since virtual box does not know where to look at we have to specifically tell it to look at our hard drive. In order to do this we have to first know where is our current hard drive located (which parking slot). In Windows 7 or any windows environment you can easily find this by typing 'diskmgmt.msc' on the run section when you press Ctrl+Shift+Esc. You should see this below,


Once you clicked ok, the disk management tool box should appeared and you should take note of your disk location which is highlighted in red for my case.

Once you have done all these, you should have a clear idea where is your parking slot (drive location). Next we will need to create this physical location for our Virtual box to read.

You all might be aware that starting from Window Vista, most of our files are being protected. In order to create a physical drive, we will need to run our command prompt or terminal by pressing cmd.exe on run or through search (advisable since we want to run our command prompt on administration access).

The command prompt should pop out and you should now find the location of your virtualbox installation directory as shown below,

copy the location and paste it into the command prompt with cd infront which will give you this

cd C:\Program Files\Oracle\VirtualBox

Next, copy the following instruction into the command prompt as well

VBoxManage internalcommands createrawvmdk -filename C:\usbdrives.vmdk -rawdisk \\.\PhysicalDrive1 -register

In my case, my parking slot (drive location) was at 1. Hence, the above code writes \\.\PhysicalDrive# will be changed to \\.\PhysicalDrive1 instead of any other number. And "C:\usbdrives.vmdk" is the location i want to save my physical drive to. You should see something like this in your command prompt,

If you see any problem with creating a physical drive, it is most likely due to your permission of your command prompt.

Installation Of Ubuntu using USB Drive onto VirtualBox

Now we are ready to tell our VirtualBox our location of our USB drive. Firstly, you would have to open your virtualbox under Administrator access similarly to the way you open up the command prompt.

Next you would have to setup a new virtual machine and under its setting choose hard drive and select the newly created physical drive file as its IDE Controller.

Now start your virtual box and it should starts loading off your thumb drive!!

After installation complete

After your installation has complete, do remember to remove your physical drive under setting and select only the Ubuntu.vi on your SATA Controller since your IDE Controller will most likely installed with the VBoxGuestAdditional.iso as shown below,