


Introduce cherry framework
Cherry is a new framework for WordPress that make it easier for users to build WorldPress themes and WordPress websites. It is a new software framework with most current and sensible approaches to produce a consistent and well-crafted website. Cherry Framework is used in WordPress to build a theme which able to call Cherry WordPress themes.
Why use cherry framework
It is a framework created by developers for developers, but it’s also a perfect solution for anyone who wants to build WordPress sites minimum time. The reason to use Cherry Framework is because themes are easy to install and all changes can be done in the WordPress admin area. There's no need to switch between WordPress, FTP or PhpMyAdmin and you can get thing done simply in WordPress admin also. Other than that, it also allows an easy way to install WordPress plugin.
In the WordPress dashboard is only have one personal dashboard experiences, but in the Cherry Framework contain an additional category called as Cherry Options. The new category has a stylized interface and brings much better overview on WordPress themes. It is contains 100+ handy options integrated into a framework with including easy adjust theme appearance, change typography, logo and navigation so on. Intuitively fine-tune slider, blog pages, portfolio and page footer so that everything appears in the style you prefer.
Installing cherry framework
Framework Installation
There are several steps to teach users how to install the Cherry Framework into WordPress:
Step 1: Go to Dashboard and select the Appearance > Themes > Install Themes. Here you should upload the file named [CherryFramework.zip] that you have download into your computer.

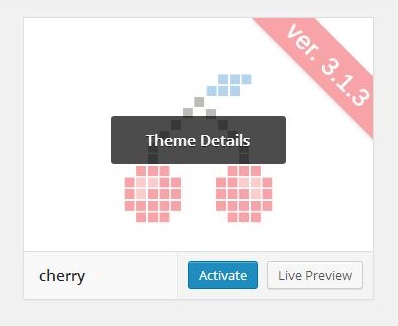
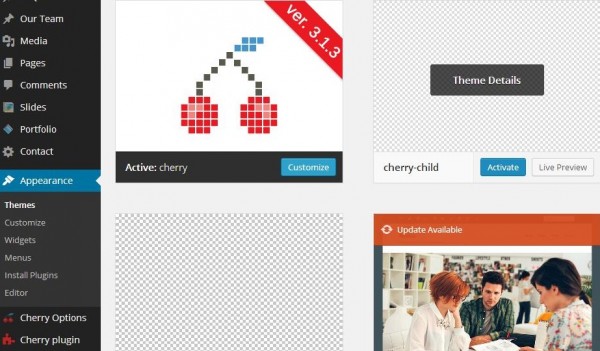
Step 2: After upload is finished, we are able to see the cherry icon in the Appearance > Themes page. Click Activate button to proceed.
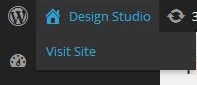
Step 3: After the activation of cherry themes, select the Home logo and click Visit Site.
Step 4: The cherry original themes will appear in the current site. At the top you are able to see the Cherry Framework Logo.

Creating a Cherry Framework theme
To create a Cherry Framework theme, usually it will separate into two parts. Cherry Framework can define as a “base/starter” theme framework. It is a stand-alone theme designed to be a flexible foundation for quicker WordPress development, usually serving as a robust Parent theme for Child themes.
Child themes allow user to modify, or add to the functionality of that parent themes. A child theme is the safest and easiest way to modify an existing theme. If we use and modify existing themes (Cherry Framework), your changes will be lost since Cherry Framework updated. Therefore, we are suggesting creating a child theme and overriding within. When the Cherry Framework makes a few tiny changes or updates, the child theme was still keep your changes.
There are several steps to teach users how to create a Child theme and install into the WordPress:
How to create a Child Themes
Step 1: To create a child themes,we would recommend that you use a descriptive name such as “parenttheme-child” (where “parenttheme” is the name of your active theme). Inside the “parenttheme-child” folder >create a style.css, then we wrote the code on below:
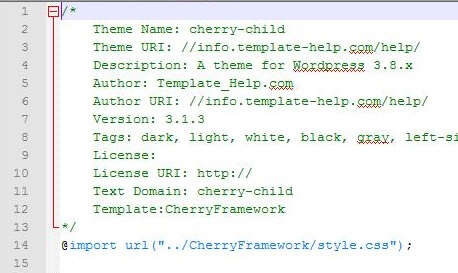
You can change each of these lines to suit your theme name. The only required lines are the Theme Name, the Template, and (if the stylesheet of your child theme is being built off of the parent theme -- with a few modifications) the '@import url' line.
Child Themes Installation
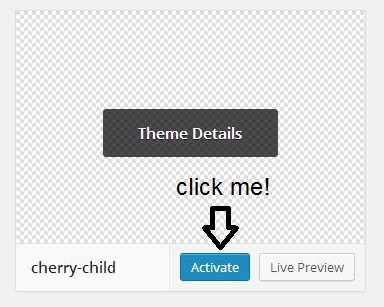
Step 2: Again go to Appearance > Themes > Add new > Upload Themes and upload your “parenttheme-child” folder that you have created as a child theme;
Step 3: After upload is finished, go again Appearance > Themes. It will show the Cherry Framework and Child theme you have uploaded just now.
Step 4: Click to active the Child themes, select the Home logo and click Visit Site. (Please refer to Framework Installation step 3 methods). Then you are able to see your site.
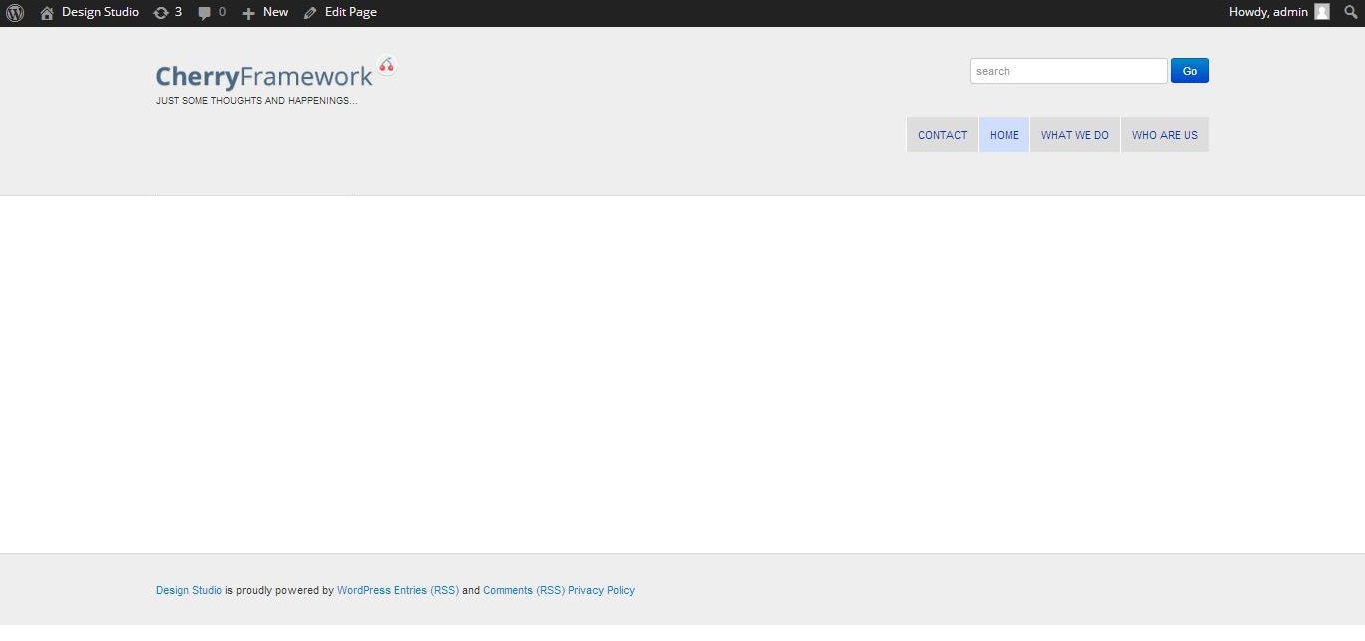
Step 5: After the activation of cherry-child, the example output is show like below.
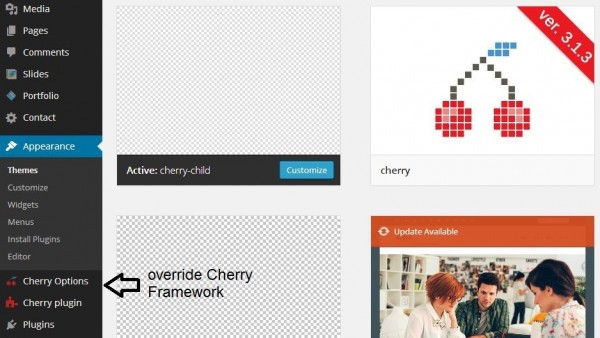
Step 6: In the Appearance > Themes, once you active the child theme you are able to see and use the cherry option function which is provided by Cherry Framework (Parent theme).
A child theme is a “drop-in” code library framework which is not a stand-alone Theme. Such frameworks cannot be installed or used as a stand-alone theme. Figure 1 below show if the WordPress have no any Parent Theme (Cherry Framework), the Child Theme (cherry-child) is unable to read also.
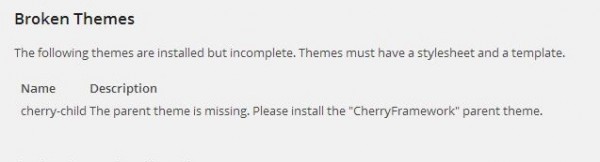
Figure 1: broken theme
Install the themes into WordPress via Server
You need access to your website via either FTP or your hosting provider’s file manager application (such as Filezilla), as it is easier to add and edit files and folders that way. Once you have logged into your website via your chosen FTP client, navigate to “/wp-content/themes/”.
This directory will contain one or more folders, each of which represents a theme installed on your site. Figure 2 show the example of using Filezilla:
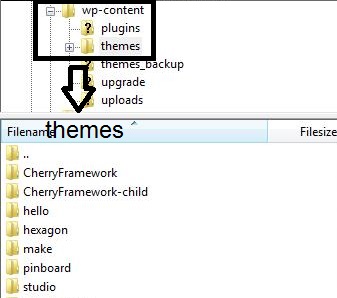
Figure 2: File ascending order in FileZilla
Conclusion
This article is to introduce, analyzing and teach how to install the Cherry Framework into the WordPress. It also includes several steps of creating a child theme with override by Cherry Frameworks. Lastly, we have include how to install the child themes into WordPress. The installation method just like the method how to install a Cherry Framework.
The WordPress is a great Platform that uses to build blogs and sites. It also provides the infrastructure to create plugin frameworks or theme frameworks on top of it. The benefits of building theme frameworks are to provide a stable, good quality themes quick and short time. This helps in faster development time and lower costs.