Tutorial: How to remove background in an image using extract feature

This is another simple tutorial that demonstrate on how to remove the background of an image.

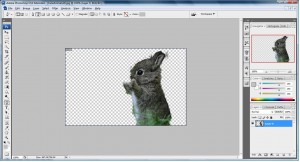
1. fire up your Photoshop and open up your image. I will use my fighter here as an example:

sgdhgjkl;lukjhgffkj3h234567890-=][;l,mnbvc

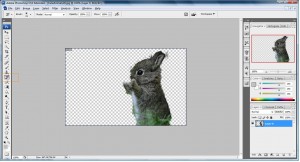
2. Ok! My fighter is summon out to my photoshop i will need to extract it out by opening up my extract tools, Filter->Extract

zxcvbj;po67i5u4y32rqwdghtul675443xcvbfgkjlop987uytwerwfvbn

3.  Start highlighting the image you want or use  Smart Highlighting feature if you have shaky hand.

fsghgjl;p768o7654twefadv

4. use the fill tools to specify which area you want and click ok.

cvdbfhjtku5wtefa

5. You will see something like this which has a lot of missing details

sgdfyui846573642qefgbngkyi787

6. Paint in missing drop outs using the History Brush Tool or use eraser to erase unwanted pixel as shown below

f7212e

7. Viola~

cuteanimals2821

There are other masking technique you can find to remove your background image from this site

Tutorial: How to change your color image to black and white

This is a simple tutorial to demonstrate how to change a  color photo to a stunning black and white image.

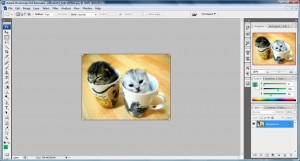
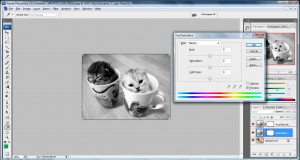
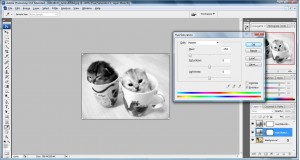
1. Fire your Photoshop and open up the color image. I will use these two 'things' in the cup XD

35nmuiukivc48764hb43v23c

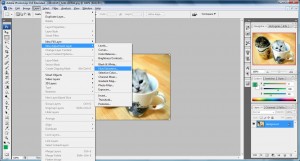
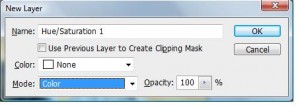
2. Choose Layer --> New Adjustment Layer --> Hue/Saturation and set the Blending Mode to Color and click 'OK'.

untitled6nhj7545f0mnbvckjhgg6jc25h678976h432c1e

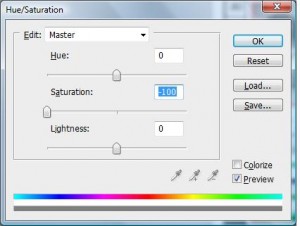
3. Choose Layer --> New Adjustment Layer --> Hue/Saturation and leave the Blending Mode to Normal. Set the Saturation to -100 Click 'OK'. Now you should have two Hue/Saturation Adjustment Layers.

byt2rvrvbtyn5btvrc

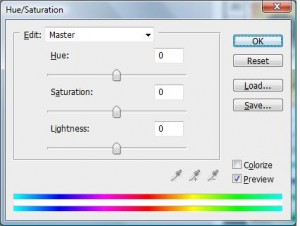
4. Double-click on the layer thumbnail of the bottom Hue/Saturation Adjustment Layer which we first created on point 2.

cvegyhuo8jhgf23245678798,7mnbvc

5. The 'Hue' slider is what makes it all happen-move it around to see how the conversion reacts. You can also boost the saturation to make the effect more drastic.

daghjh34f3d

6.  Tweaking the 'Hue' slider to your liking

7. Save the file and Viola!

44334153_3e9114058d-copy


Javascript Tutorial: Handling All Errors

I found a very interesting method to handle errors on JavaScript. What this does is to handle all error occurs in the script to a single function so whenever any error occurs, it will go into this particular function and alert the user.

JavaScript

function handleError()
{
alert(An error has occurred!');
return true;
}
window.onerror = handleError;

What it does is that whenever a run time error occurs, the function will goes into action! For example you try to trigger a function that does not exist! Instead of making your program stop functioning, we can provide a error message using the above method which can promote a more user friendly environment whenever an error occurs on our script. This is neat stuff!

CSS: Box Model Problem/Hack

The problem caused by different browsers way of interpreting a CSS element has emerge the need of CSS hack. The box model hack was developed by Tantek Celik, the lead developer of Internet Explorer for the Mac to solve the issue on IE 5 border and padding problem. The total width of the box SHOULD be calculated by adding the border thickness on the left and right, the padding on the left and right and the width of the content. Thus, Consider the following code:

<code>#test{
background: #ff8132;
border: 5px solid #ff0000;
padding: 15px;
width: 100px;
}
</code>

The above code should create a box with a 5-pixel border and 15 pixels of padding around the content which has a 100 pixel width. This gave a total width of 140 pixels.

Unfortunately, some common browsers ( IE 6 and below) interpret this code incorrectly, Instead of applying the width to the content area, the width restrains the overall box size, so that the border and padding subtracted from the over width! So we are left with a box 100pixels width, but a content area only 60 pixel wide!!( width - left and right border+padding = 60 pixel)

This cause cross browser issues when displaying the same box on for example, IE and Firefox! Firefox will display a box of total width 140 pixel while IE will only display the same box with a total width of 100 pixel! To fix this, we need to use a hack, that is, we have to intentionally introduce code that doesn't work in one browser so that both boxes have the same width.(writting  a code that work in IE but fail in firefox so that both of them have 140 pixel)

We will be taking advantage of a bug in IE that causes it to ignore certain CSS so that it set the true width:

<code>#test{
background: #ff8132;
border: 5px solid #ff0000;
padding: 15px;
<span style="color: #ff0000;">voice-family: "\"}"\";
voice-family: inherit;</span>
width: 100px;
}
</code>

But this will caused problems in Opera unless we add a definition after the above code

<code>html>body #test{
width: 100px;
}</code>

This allows browsers that understand the parent/child selector grouping to correctly interpret your code. Nowadays, with IE 7 came along, this problem will not be shown on the newer browser but for older browser on old pc this is still a problem. Other than the box model problem, presently there are still problems exist on today browsers due to different implementation and interpretation by these browsers. The need of CSS hack is still needed so that cross browser issues caused by CSS can be eliminated.

Point to consider when building a dynamic site

Understanding layout on Web

All web layouts have two basic parts. The first part is the content area while the other part is filler. Based on this balance, there are four broad categories of web layout.

  • Unrestrained. The content is allowed to stretch horizontally from the left edge to the right edge of the window and vertically down to the bottom edge of the window which eliminate the needof filler.
  • Fixed width. The content is given a set fixed size on its width, restraining the content horizontally.
  • Fixed height. The content area is given a fixed length on its height, restraining it vertically.
  • Fixed size. Both height and width are given a fixed width restraining the content regardless of screen size.

Understanding Hypertext, Navigation  and Controls

  • Navigation: these are links used to move the visitor between different general sections and pages within the site
  • Controls: these are links or buttons used to perform a specific action, such as submit a form
  • Hypertext: these are links used to display additional information about the specific text being linked.

Four D's of Web Design

  1. Define
  2. Design
  3. Develop
  4. Deploy

Define

In order to start designing a site, one have to collect, identify, and distill the information that will make up your site.

  • Collect your content
  • know your audience
  • establish your goals
  • plan features and interactivity
  • consider the graphic design style

These are the points must be taken into consideration when defining and planning the site.

Design

  • Outline the site
  • create a site map
  • Sketch the layout grid
  • create a storyboard
  • define the look and feel

these are the points needed before designing the site.

Develop

  • prepare the content
  • create the code
  • create a template
  • Assemble the pages
  • test your site

Deploy

The web site may be built and tested and its now ready to go live!