Tutorial: How to make your own shuffle effect with jQuery

i think after you have read most of my effect tutorial on jQuery, you will notice that effect is just playing around with CSS. Nonetheless, without jQuery help using pure JavaScript to achieve the same result will really take a lot of time than the usually time we spend on jQuery. Anyway, back to the topic that i am going to write. In this tutorial, i will demonstrate another very simple concept to shuffle your containers or images. I believe this should be the last effect available in the market currently. Most of the effect i should have covered them up.

Tutorial

i find this way of writing tutorial is easy for me to understand and its much more neat and clearer compare to my other tutorial which is quite a mess. So i will continue using such structure to write my tutorial as much as possible. If you have any feedback or improvement that i can make, please send me an email or just leave a comment. =)

Concept

Let's imagine you have a set of poker card. The poker cards should be shown on the screen in a z-axis way. When we shuffle, we take the highest card, pull it out and placed at the back (Sound like a first in last out concept to me). Let's assume each container is a card. We will have to stack the card together in a z-axis row in order to simulate the pattern of a poker card deck. Well, since its programming we can really just have 2 containers and placed the image on the second level so that when the first image is being shuffled down, the second level image is being displayed during the shuffling of the first card. But let's not do such complex stuff, we are doing a simple tutorial right? Opps.

CSS

from the description in the concept section, the necessary and required CSS rule to apply on the containers are most probably something that can help us stack n containers together. Below listed the approximate rule required for shuffle effect to work.

  • position: absolute - so that every container in the deck has a MUST obey position
  • z-index: x - so that every element is being position in an z-axis level
  • top: x em - the vertical position of the container
  • left: x em - the horizontal position of the container
  • float: left - we float all element so that they are no longer on the ground

where x is an integer value. Please take note that if you do not provide a type for your top and left, it may post a problem later when you try to shuffle your containers. Another thing to take note, z-index don't take in types like em or px, it is a pure number without type.

HTML

with the CSS rule declared, its time to setup our structure for each container. The structure of the container is fairly easy to setup. We just need a set of n containers in order to display different container during shuffling.

Coding

This part always get a bit confusing when there are piece and pieces of code flying around the place. But i will try my best to explain what is happening in here.

On the HTML page, i have allocated the following containers as describe above.

<div class='card' id='box1'></div>
<div class='card' id='box2'></div>
<div class='card' id='box3'></div>
<div class='card' id='box4'></div>

On the CSS external script, the amount of code required is also smaller compare to other tutorial since there is only 1 type of container we are dealing in this tutorial. The stylesheet is as follow,


div.card
{
width: 25em;                    /* width of each container*/
height: 20em;                    /* height of each container*/
position: absolute;                /* instructure each container to obey the position absolutely*/
float: left;                    /* float all the container so that they overlapped each other*/
left: 34%;                        /* align them to the center of the screen */
border: #000 solid 10px;        /* give it a border to make it look nice*/
}

div#box1
{
background-color: #66A666;/*green*/
}
div#box2
{
background-color: #E37373;/*pink*/
}
div#box3
{
background-color: #B2B2B2;/*grey*/
}
div#box4
{
background-color: #A51515;/*red*/
}

There is something interesting in here that you might want to know, when we set position of a div tag, the z-index property is being set to auto in default. Thus, the last container in our example(box4) will be the one display on the top of the stack. Unless we overwrite the z-index css properly. This is what we will see after we have our structure and CSS done.
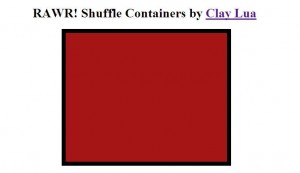
shuffle structure image

IT IS JUST A BOX! Definitely, this is a box alright. Other containers are behind the container shown on the image. Notice that the last container on the HTML structure is being displayed instead of the first container? This is the reason why z-index is important later when shuffling the containers.

Lastly, we will be on our way to tackle jQuery coding after we have complete the structure required for our shuffle effect.  So what i will be going to do is to attach an event handler on each container. Once the event is being triggered, we will animate the top object to the right and pull it back down the queue by setting it z-index to a lower value. The code is presented below,

$(function(){
var i = 0;
$('div.card').click(function(){
$(this)
.animate({left: 15+'%', marginTop: 2+'em'},500, 'easeOutBack',function(){i--;$(this).css('z-index', i)})
.animate({left: 38+'%', marginTop: 0+'em'},500, 'easeOutBack');
});
});

The code done as what i instructed. Igive a variable i to hold the current level of z-index. adding event handler to all of my elements, once an event occurs, i will move the call object to the left and bottom 2em with the easing ability of easeOutBack from the jQuery plugin made available by George.  After the animation has completed, i set the z-index of the container to a lower level and pull it back in with another animation. And this will give you a nice shuffle effect as shown in the demo. You can download the tutorial file at jquery-shuffle-effect

That is all i have for you in this tutorial hope you enjoy this! I sure did! Cheers~

Tutorial: How to create your own continuously slide effect plugin with jQuery

The effect i show up till now are all discontinuous effect that can be easily create using CSS and jQuery. Some people may wonder how continuous sliding effect is being achieved. In this tutorial, i will demonstrate the concept and a plugin which i build immediately during this tutorial on how to simultaneously pull out the containers in the easily way. The demo can be view at the bottom of this post.

Concept

The concept for continuously sliding effect is really not that difficult. Imagining you have a photo frame and a long list of photo arranged in a straight row. The list is placed behind the photo frame and you started to pull it accordingly to  display a new photo within the frame. Anything outside the frame is being blocked which restrict the display only within the frame itself. This way you will see a continuously slide effect being displayed.

CSS

From the description above, it is clear that css is required to assist on building the effect (every type of effect cannot escape the demon hand of CSS! RAWR!). And below listed the required CSS rule from the description written above.

  1. float: left -  to flow all containers in a straight row
  2. position: relative - so that the container can be hidden in IE and FF
  3. overflow: hidden -  we want to hide all other element outside the frame
  4. margin-left or left: - this is where we adjust the element so that it get pull to the left or right within the frame

HTML

On the description above, we will have a rough idea how many containers are required to built the effect and plugin. The following list down the approximate container required.

  1. Main Frame
  2. container to contain x element
  3. the x number of elements in the frame
  4. next button
  5. right button

Everything is put it simple so that we have a clear idea how this is being done. The reason why we need the extra container to contain the x element is because the element WILL NOT float side by side if you do not define a length that is big enough for all elements to go side by side.

Coding

This part always get a bit confusing when there are piece and pieces of code flying around the place. But i will try my best to explain what is happening in here.

On the HTML page, i have allocated the following containers as describe above.

<div id='frame'>
	<div id='container'>
		<div class='box' id='box1'></div>
		<div class='box' id='box2'></div>
		<div class='box' id='box3'></div>
		<div class='box' id='box4'></div>
	</div>
<div id='prev'></div>
<div id='next'></div>
</div>

It should be clear that there is 3 main containers which are the frame,next and right button. And within the frame there is another container which contain the 4 element that we will be interested to slide them around. The reason why both navigation button are within the frame so that the button will always be within the container.

On the CSS external script, the below listed out all the necessary elements that we mention on the CSS section.

body{
margin: 0 auto;					/*align the display at the center*/
text-align: center;				/*align the display at the center*/
}

div#frame{
margin: 0 auto;					/*align the frame at the center*/
width: 50em;					/*frame width*/
height: 25em;					/*frame height*/
border: #000 solid 10px;		/*frame border*/
position: relative;				/*position relative so that it gets hide in IE*/
overflow: hidden;				/*hide all overflow element out of the frame*/
}
div#container
{
position: relative;				/*position relative so that it gets hide in IE*/
width: 200em;					/*the width must be big enough so that all elements can align side by side*/
height: 25em;					/*container height*/
}
div.box
{
float: left;					/*float each element side by side*/
width: 50em;
height: 25em;
position:: relative;
}

div#box1
{
background-color: #66A666;
}
div#box2
{
background-color: #E37373;
}
div#box3
{
background-color: #B2B2B2;
}
div#box4
{
background-color: #A51515;
}

div#next
{
width: 3em;
height: 5em;
top: 50%;			/*align it vertically center*/
margin-top: -2.5em;	/*align it vertically center*/
right: 0em;
position: absolute;
background: transparent url(../images/next.png);
}
div#prev
{
width: 3em;
height: 5em;
left: 0em;
top: 50%;			/*align it vertically center*/
margin-top: -2.5em;	/*align it vertically center*/
position: absolute;
background: transparent url(../images/prev.png);
}

If you wonder how the left and right button is aligned on center, you can see the explanation at How to align center on the screen when using position absolute with CSS
i have indicated the comment on the code itself so that it can be self explain instead. After all of these settings, you should be able to get something like this.

sliding container
sliding container

Look pretty decent right? Now come the real code in jQuery. So we want to pull to the next element  to the right to simulate continuously sliding, we will attach an event handler to both next and previous button. Using the animate() function in jQuery, this will be a piece of cake.

$(function(){
var i = 0;
	$(this).click(function()
	{
		if(this.id==op.prevImageID.replace("#",""))
		{
			i++;
			if(i > 0)
			i=(0-(op.noOfContainer-1))
		}
		else if(this.id==op.nextImageID.replace("#",""))
		{
			i--;
			if(i<(0-(op.noOfContainer-1)))
			i=0;

		}
		$("div#container").animate({marginLeft: i*op.containerW+"em"},op.duration);
		
	});

The first sentence in the code indicate that if previous button is pressed, we add the counter and check whether it is more than the available container. If the counter has go pass the available containers, we will push it to the last container available. We did the same for the next button too! but in descending order. Finally, we animate the scrolling according to the the given counter with the size of each element.

Plugin

I really do not know whether there is a need for such plugin since its really quite simple. But i will still provide it like i said previously. So with the explanation above, i will refractor the code a bit so that it is flexible enough to become a plugin.

Parameter

  • prevImageID: previous button image id
  • nextImageID: next button image id
  • noOfContainer: number of container
  • containerW: width of container
  • duration: duration of animation

in order to change the display, just change the css code in ini.css. No hardcoded code in the javascript itself. There can be more flexibility in the future of this plugin which i will place in more feature if i get the time. If you would like to support me, you can always throw in some bucks for the maintance of this plugin.

[donate]

File

  • Current version: 1.0
  • Last Update: 09/8/2009
  • Licensing: MIT
  • Download
  • demo

jQuery Plugin: RAWR! Image Effect Gallery (RIEG)

RAWR image effect gallery(RIEG) is a flexible and fully customize image gallery which can be adjusted to fill your need. It is design so that it is simple to use without much complexity on the usage of the plugin. Currently, RIEG plugin provides 7 fixed and a custom effect with different combination of easing which can be configured within the plugin using George easing plugin. RIEG is currently released on alpha testing and i will try to update it in the future with more effect and feature.

Information

  • Current version: 1.0 (Alpha)
  • Licensing: MIT

Browser Tested

  • Firefox 3.0.7
  • IE 7.0.5730.13
  • Opera 9.64
  • Google Chrome
  • Safari

Dependencies

  • lightbox by Warren Krewenki (optional),
  • Easing plugin by George McGinley Smith
  • jQuery 1.31

Documentation

Here listed the entire variable you can use to customize RIEG. There are some example which should be easy enough to understand how to use this plugin.

1.0 Example

All you need is a HTML tag which should be placed on the bottom of your HTML file.

<div id="rawr">
<img id="gallery" src="images/start.jpg"/></div>
</div>

import all the dependency library,plugin and stylesheet

<script type="text/javascript" src="js/library.js"></script>
<script type="text/javascript" src="js/jquery.RIEG.js"></script>
<script type="text/javascript" src="js/easing.js"></script>

Finally, initialize RIEG. (click on plain text for better view)

$("#gallery").RIEG({
url: [
"http://photography.nationalgeographic.com/staticfiles/NGS/Shared/StaticFiles/Photography/Images/POD/h/hanging-laundry-1203294-sw.jpg",
"http://photography.nationalgeographic.com/staticfiles/NGS/Shared/StaticFiles/Photography/Images/POD/m/madidi-trees-646088-sw.jpg",
"http://photography.nationalgeographic.com/staticfiles/NGS/Shared/StaticFiles/Photography/Images/POD/j/jellyfish-swarm-palau-131157-sw.jpg",
"http://photography.nationalgeographic.com/staticfiles/NGS/Shared/StaticFiles/Photography/Images/POD/s/shark-kingman-reef-1166392-sw.jpg",
"http://photography.nationalgeographic.com/staticfiles/NGS/Shared/StaticFiles/Photography/Images/POD/h/havasu-creek-waterall-sw.jpg",
"http://photography.nationalgeographic.com/staticfiles/NGS/Shared/StaticFiles/Photography/Images/POD/p/polar-bears-svalbard-1205962-sw.jpg",
"http://photography.nationalgeographic.com/staticfiles/NGS/Shared/StaticFiles/Photography/Images/POD/p/pictured-rocks-lakeshore-sw.jpg",
"http://photography.nationalgeographic.com/staticfiles/NGS/Shared/StaticFiles/Photography/Images/Content/hibiscus-petals-758680-sw.jpg",
"http://photography.nationalgeographic.com/staticfiles/NGS/Shared/StaticFiles/Photography/Images/Content/swirling-aurora-754878-sw.jpg",
"http://gallery.photo.net/photo/6922516-md.jpg",
"http://gallery.photo.net/photo/6823111-md.jpg",
"http://gallery.photo.net/photo/7360351-md.jpg",
"http://photography.nationalgeographic.com/staticfiles/NGS/Shared/StaticFiles/Photography/Images/POD/v/volcano-winter-521567-sw.jpg",
"http://www.studio7designs.com/_media/images/photography_portfolio_01.jpg",
"http://photography.nationalgeographic.com/staticfiles/NGS/Shared/StaticFiles/Photography/Images/POD/m/mangroves-bali-1047803-sw.jpg",
"http://photography.nationalgeographic.com/staticfiles/NGS/Shared/StaticFiles/Photography/Images/Content/arctic-rainbow-nicklen-673279-sw.jpg",
"http://science.nationalgeographic.com/staticfiles/NGS/Shared/StaticFiles/Science/Images/Content/sedimentary-slope-a2wd32-sw.jpg",
"http://photography.nationalgeographic.com/staticfiles/NGS/Shared/StaticFiles/Photography/Images/Content/green-landscape-haas-1093772-sw.jpg",
"http://photography.nationalgeographic.com/staticfiles/NGS/Shared/StaticFiles/Photography/Images/Content/suruga-bay-doubilet-101053-sw.jpg",
"http://photo.net/photo/pcd0787/san-galgano-19.4.jpg",
"http://photography.nationalgeographic.com/staticfiles/NGS/Shared/StaticFiles/Photography/Images/Content/cherry-blossom-tree-monument-720322-sw.jpg",
]
});

This is the simplest way to initialize RIEG without adjusting the default setting. You can adjust the setting according such as this one which change the screen size and effect. (click on plain text for better view)

$("#gallery").RIEG({
url: [
"http://photography.nationalgeographic.com/staticfiles/NGS/Shared/StaticFiles/Photography/Images/POD/h/hanging-laundry-1203294-sw.jpg",
"http://photography.nationalgeographic.com/staticfiles/NGS/Shared/StaticFiles/Photography/Images/POD/m/madidi-trees-646088-sw.jpg",
"http://photography.nationalgeographic.com/staticfiles/NGS/Shared/StaticFiles/Photography/Images/POD/j/jellyfish-swarm-palau-131157-sw.jpg",
"http://photography.nationalgeographic.com/staticfiles/NGS/Shared/StaticFiles/Photography/Images/POD/s/shark-kingman-reef-1166392-sw.jpg",
"http://photography.nationalgeographic.com/staticfiles/NGS/Shared/StaticFiles/Photography/Images/POD/h/havasu-creek-waterall-sw.jpg",
"http://photography.nationalgeographic.com/staticfiles/NGS/Shared/StaticFiles/Photography/Images/POD/p/polar-bears-svalbard-1205962-sw.jpg",
"http://photography.nationalgeographic.com/staticfiles/NGS/Shared/StaticFiles/Photography/Images/POD/p/pictured-rocks-lakeshore-sw.jpg",
"http://photography.nationalgeographic.com/staticfiles/NGS/Shared/StaticFiles/Photography/Images/Content/hibiscus-petals-758680-sw.jpg",
"http://photography.nationalgeographic.com/staticfiles/NGS/Shared/StaticFiles/Photography/Images/Content/swirling-aurora-754878-sw.jpg",
"http://gallery.photo.net/photo/6922516-md.jpg",
"http://gallery.photo.net/photo/6823111-md.jpg",
"http://gallery.photo.net/photo/7360351-md.jpg",
"http://photography.nationalgeographic.com/staticfiles/NGS/Shared/StaticFiles/Photography/Images/POD/v/volcano-winter-521567-sw.jpg",
"http://www.studio7designs.com/_media/images/photography_portfolio_01.jpg",
"http://photography.nationalgeographic.com/staticfiles/NGS/Shared/StaticFiles/Photography/Images/POD/m/mangroves-bali-1047803-sw.jpg",
"http://photography.nationalgeographic.com/staticfiles/NGS/Shared/StaticFiles/Photography/Images/Content/arctic-rainbow-nicklen-673279-sw.jpg",
"http://science.nationalgeographic.com/staticfiles/NGS/Shared/StaticFiles/Science/Images/Content/sedimentary-slope-a2wd32-sw.jpg",
"http://photography.nationalgeographic.com/staticfiles/NGS/Shared/StaticFiles/Photography/Images/Content/green-landscape-haas-1093772-sw.jpg",
"http://photography.nationalgeographic.com/staticfiles/NGS/Shared/StaticFiles/Photography/Images/Content/suruga-bay-doubilet-101053-sw.jpg",
"http://photo.net/photo/pcd0787/san-galgano-19.4.jpg",
"http://photography.nationalgeographic.com/staticfiles/NGS/Shared/StaticFiles/Photography/Images/Content/cherry-blossom-tree-monument-720322-sw.jpg",
],
effect: "zoom",
inEasing:"linear",
outEasing: "linear",
duration: 500,
screenW: screen.width/2,
screenH: screen.height/2.2

});

2.0 Section Description

description file on each section

3.0 RIEG API

api in Excel SpreadSheet

Variable name Type Default Value Limitation Description
url array string none IMAGE PATH ONLY array of string used in RIEG
loadingURL string http://www.sofa-framework.org/design/loading_wh.gif IMAGE PATH ONLY loading image used in RIEG
flipWidth int 0 SCREEN WIDTH width length of flip effect
fadeIn decimal 1 1 fade in opacity amount
fadeOut decimal 0 1 fade out opacity amount
zoomW int 10 SCREEN WIDTH zoom width
zoomH int 10 SCREEN HEIGHT zoom height
effect string slideRight slideRight
slideLeft
slideUp
slideDown
custom
flip
zoomfade
This is case sensitive, only the following limitation are allow
inEasing string easeInBounce SECTION 3.0 This is case sensitive, only the following limitation are allow
outEasing string easeOutBounce SECTION 3.0 This is case sensitive, only the following limitation are allow
customLeft int 0 INTEGER ONLY css left
customTop int 0 INTEGER ONLY css left
customWidth int 0 INTEGER ONLY css width
customHeight int 0 INTEGER ONLY css height
duration int 1000 INTEGER ONLY duration of animation effect
screenH int 400 INTEGER ONLY image screen height, can use mathematical calculation
screenW int 600 INTEGER ONLY image screen width, can use mathematical calculation
thumbnailH int 30 INTEGER ONLY thumbnail height, can use mathematical calculation
thumbnailW int 30 INTEGER ONLY thumbnail width, can use mathematical calculation
rawrgallery string #rawr STRING ONLY css id value
galleryContainer string #rawr-gallery-container STRING ONLY css id value
navigation string #rawr-images STRING ONLY css id value
navRight string #rawr-right STRING ONLY css id value
navLeft string #rawr-left STRING ONLY css id value
mainNav string #rawr-nav STRING ONLY css id value
mainControl string #rawr-control STRING ONLY css id value
controlPrev string #rawr-prev STRING ONLY css id value
controlNext string #rawr-next STRING ONLY css id value
controlNav string #rawr-nav-visibility STRING ONLY css id value
controlSlideShow string #rawr-slideshow STRING ONLY css id value
controlPrevDesc string Previous STRING ONLY description fo previous icon
controlNextDesc string Next STRING ONLY description for next icon
controlNavDesc string Disable Navigation Bar STRING ONLY description for navigation icon
controlSlideShowDesc string Start/Stop Slideshow STRING ONLY description for slideshow icon
navEasing string linear SECTION 3.0 easing functionality of navigation bar
navSpeed int 1500 INTEGER ONLY speed of animation of the navigation bar
nav_border string #787878 solid 1px STRING ONLY CSS declaration for border
gborderSize int 10 INTEGER ONLY the frame size of the gallery
gborderColor string #F0F0F0 STRING ONLY the color of the gallery border, white in default
navLeftButton string images/left.png IMAGE PATH ONLY The navigation left arrow button
navRightButon string images/right.png IMAGE PATH ONLY The navigation right arrow button
nav_screenH int 50 INTEGER ONLY the navigation screen height, can use mathatical calculation
nav_screenW int 500 INTEGER ONLY the navigation screen width, can use mathatical calculation
elementHeight int 20 INTEGER ONLY controller icon height on the top right hand corner
elementWidth int 20 INTEGER ONLY controller icon width on the top right hand corner
controlWidth int 60 INTEGER ONLY controller container width
controlHeight int 20 INTEGER ONLY controller container height
controlSlideShowInPath string images/play.png IMAGE PATH ONLY controller icon play
controlSlideShowOutPath string images/stop.png IMAGE PATH ONLY controller icon stop
controlPrevPath string images/prev.png IMAGE PATH ONLY controller icon previous
controlNextPath string images/next.png IMAGE PATH ONLY controller icon next
navigationShow string visible visible/hidden to enable visibility of the navigation bar located on the bottom of RIEG
autoSlideShow boolean FALSE TRUE/FALSE the slideshow will not be on in default
slideShowSpeed int 4000 INTEGER ONLY the speed of the slide show
popOut boolean TRUE TRUE/FALSE whether to add on click function on the image to display the original size image
imageNext boolean FALSE TRUE/FALSE whether to add in the event on the image so that when clicked it will go to the next image

4.0 Easing capability

This is taken from George McGinley Smith easing plugin. It is case sensitive.

  • swing
  • linear
  • easeInQuad
  • easeOutQuad
  • easeInOutQuad
  • easeInCubic
  • easeOutCubic
  • easeInOutCubic
  • easeInQuart
  • easeOutQuart
  • easeInOutQuart
  • easeInQuint
  • easeOutQuint
  • easeInOutQuint
  • easeInSine
  • easeOutSine
  • easeInOutSine
  • easeInExpo
  • easeOutExpo
  • easeInOutExpo
  • easeInCirc
  • easeOutCirc
  • easeInOutCirc
  • easeInElastic
  • easeOutElastic
  • easeInOutElastic
  • easeInBack
  • easeOutBack
  • easeInOutBack
  • easeInBounce
  • easeOutBounce
  • easeInOutBounce

Support

  • Please post questions to the jQuery discussion list, putting [validate] into the subject of your post, making it easier to spot it and respond quickly. Keep your question short and succinct and provide code when possible; a test page makes it much more likely that you get an useful answer in no time. Alternatively, you can also post your question on the update post or email me at [email protected].
  • Please post bug reports and other contributions (enhancements, features, etc.) to [email protected] and i will try to get back to you asap. You can also try post it on jQuery plugin page.

Donation

[donate]

Update

  • Updated test site to include fade effect.

File

IE, Opera and Netscape issues on ‘Stop page loading’ with javascript

In case you don't know what i am referring on the topic, i really mean to stop the page from loading on the background of the browser. Usually, pressing STOP icon in the browser will stop any activity in a browser. Background activity that we are interested are uploading, preloading, retrieving and etc. of any dynamic activity that the browsers are dealing with when the page fire up ajax functionality. There are only three browser that are in my concern list because these are the browsers that are being used today.

Netscape

Netscape browsers are Mozilla Firefox, Google Chrome and Safari. These are Netscape browser which most developers or Mac users used when developing web application and design. Obviously, finding a solution for Netscape page load function is pretty easy and we can also manually press the X button on the top of the browser to stop all activity in a netscape browser. Ultimately, we will know that there is a function in Netscape browser that can stop all activity since the stop button on the browser is performing such action.  In case you are still wondering what the heck is the javascript code,

window.stop();

The above will stop all activity which include stopping the page from loading and preventing any uploading to occurs. Any preload of image will also be stop by this javascript method.

Internet Explorer (IE)

IE having the majority users in the world is still lagging such function. It is possible to stop page from loading by using the following javascript code.

document.execCommand('Stop')

which will return you an empty page when executed during page load. However, this will only stop the page from loading! Other activity such as uploading and preloading of images will still occur. There is practically no way to stop the background activity in an IE browser. If you fire up an ajax application in an IE browser, you won't see any 'activity' at the bottom of the page indicating it is retrieving the request. Pressing stop button won't disable IE from retrieving unless you escape the page which a dynamic web site do not want it. In short, once a request is fired to IE, there is no cancellation for that request.

Opera

Opera work quitte similiar with IE.  Although by interface and efficiency, Opera is much MUCH superior than IE, it still doesn't gain much market share in the browser industry. So how do we stop activity in Opera? There are definitely some way of stopping the activity in Opera which i personally believe. However, due to the small community available for Opera, you won't find any good answer avaliable in Google.  However, Opera can use event bubbling to stop certain event from happening. (this mean it cannot stop event that has already happen)

Summary

The reason for this article is to prevent people like ME who hunt for such solution so that my RIEG jQuery plugin test site can work perfectly in all browser. And the reason why people will want to stop activity in the background of the browser is because in a dynamic environment, we will want to remove the existing DOM element and replace these DOM element with a new one. However, as existing request is still being sent through the browser, it is necessary to stop those existing request before sending out the new request so that the display will be flawless! Unfortunately, this cannot be done. (sad)

Tutorial: How to stop caching with jQuery and javascript

There are many reason people want to disable or stop caching by broswer. Especially when we are dealing with dynamic content that required the latest version to be displayed on the browser. However, due to security reason there are no perfect methods in javascript that can disabled caching for all browsers. In this tutorial, i will demonstrate a few way both javascript and jQuery used to stop or disable caching by browsers.

jQuery

On the later version of jQuery v1.2 above, jQuery has provided a method to stop caching by browser with its ajax class. You can visit jQuery website to see the list of update on v1.2 and you will notice that they have now included a function to disable caching! You can either choose to control the way each individual dynamic content cached by setting the properties to true/false or you can just set a default to disabled all browser caching.

In order to determine each ajax call caching properties,

$.ajax({
url: 'test.html',
cache: false,
success: function(html){
$('#results').append(html);
}
});

which is being reflected on the jQuery example. And in order to disable all caching by the browser we can do the following,

$.ajaxSetup({cache: false}});

This will have to be placed on top of the script in order for it to work.

Javascript

The reason why browsers are able to cache a particular document is due to the url being passed to the browser are identical. In order to make it unique for each passes, we can place in a random number behind the url as shown below,

var img.src = 'www.hungred.com'+'?'+Math.random()*Math.random();
return $(img).load(function()
{
alert('completed!');
});

This method will ensure all document to be unique for every dynamic passes you throw to the browser which i find it more reliable and useful as this method has been there for quite sometimes and almost all of the browser will support such way of retrieving dynamic content.

HTML (16/04/2009)

You can also disable or stop caching using  the following meta tag,

<meta http-equiv='cache-control' content='no-cache'>
<meta http-equiv='expires' content='0'>
<meta http-equiv='pragma' content='no-cache'>

This will prevent the whole page from being cached by the browser as well.