How to draw a rainbow with Adobe Illustrator

straight line with illustrator using pen tool

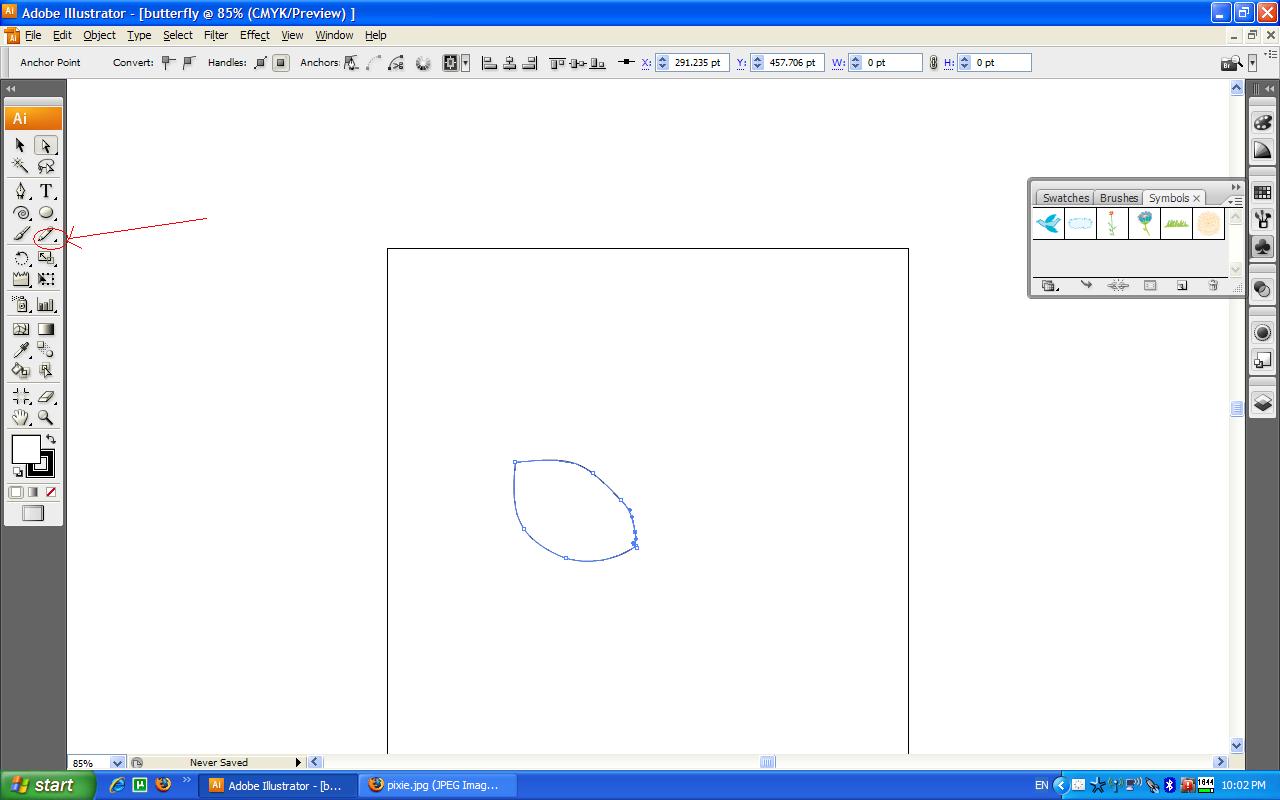
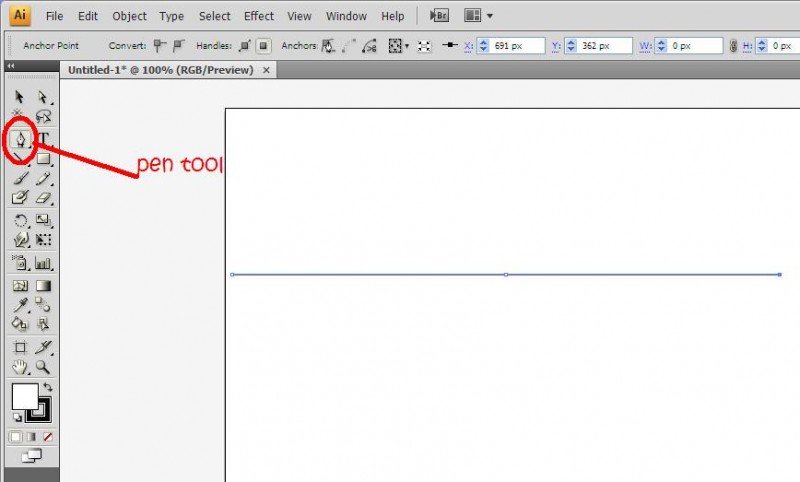
1. First, using the pen tool, draw a straight line with three anchors. I had a radius of 297 px so a total distance of 594px

rainbow2

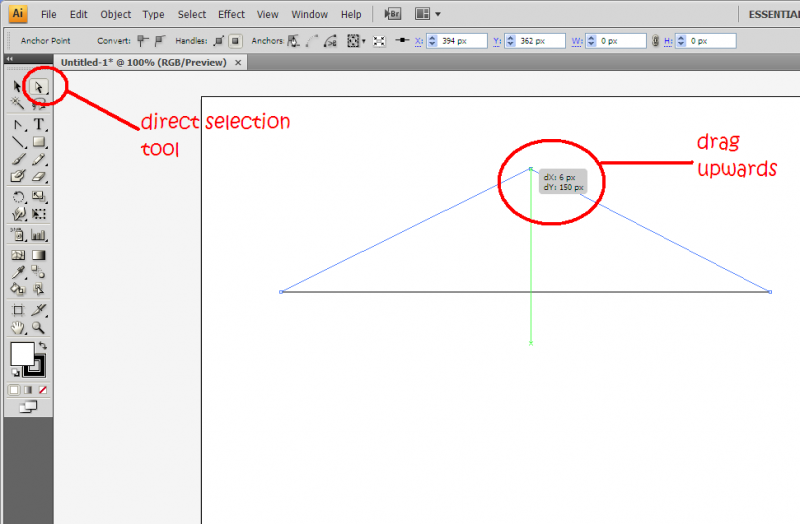
2. Next, using the direct selection tool (A) click on the middle anchor and drag it upwards. I dragged up about 150 px from the original distance.

rainbow3

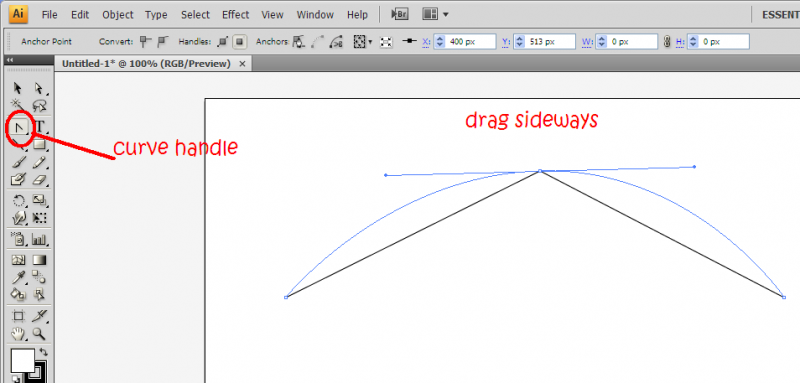
3. Using the curve handle (under the pen tool), drag the middle anchor sideways so you get a nice curve.

duplicate 7 times

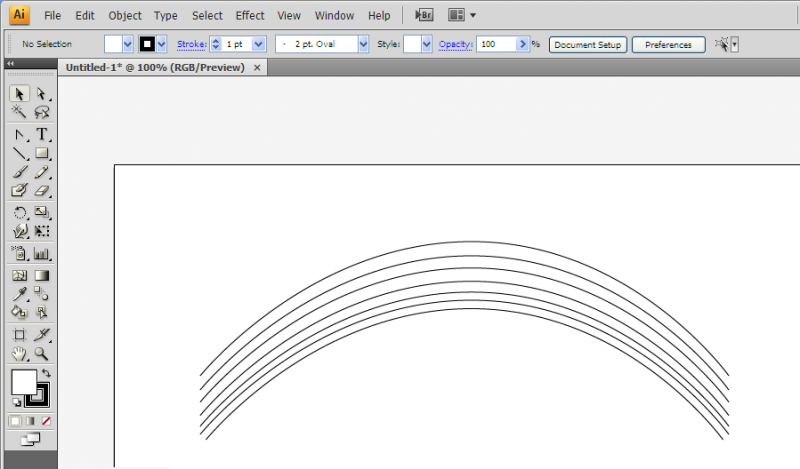
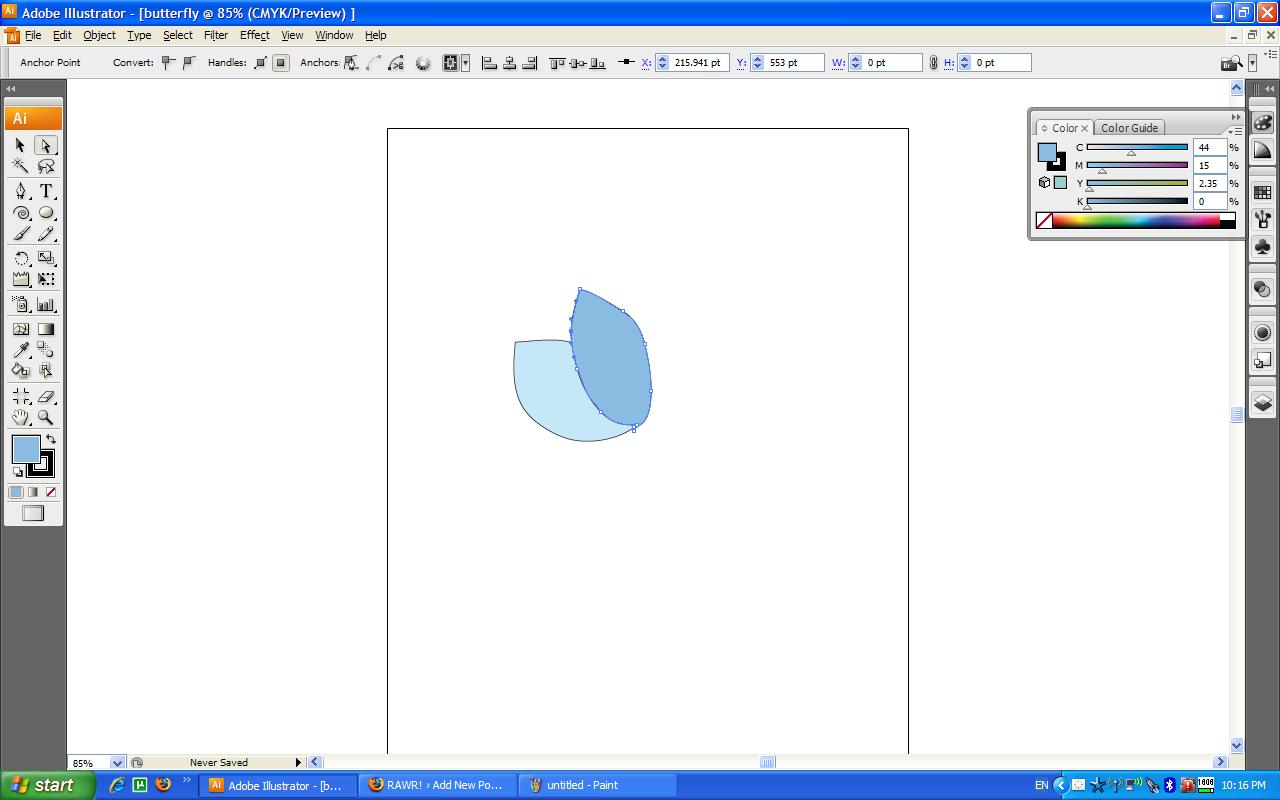
4. Duplicate this seven times, one for every colour of the rainbow 😉 Be sure to reduce the gaps as you go along because red is the most visible the purple the least. You might want to use the direct selection tool to bend the curves a bit as you go along arranging the curves.

fill in colour

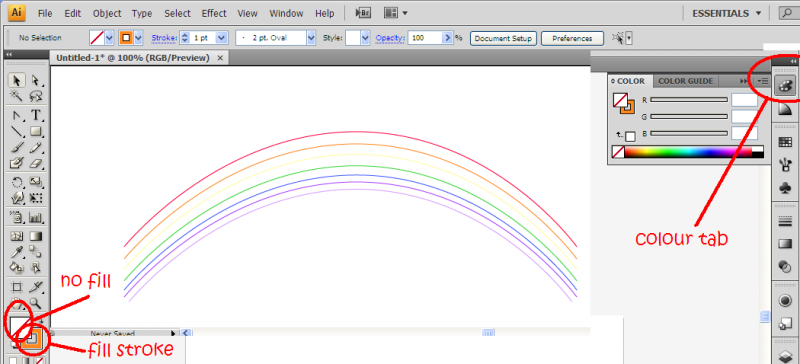
5. Colour each stroke from the top to the bottom as follows: Red>orange>yellow>green>blue>indigo>violet. No brownie points given as to why.

select all

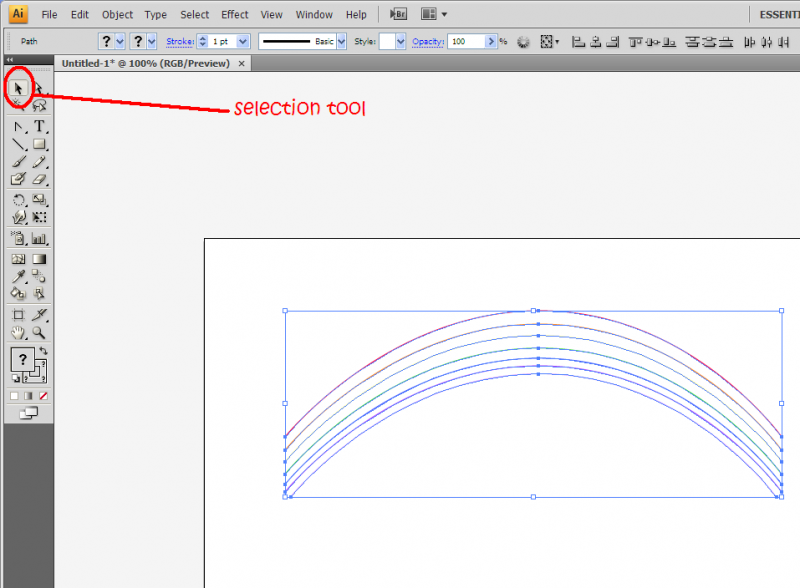
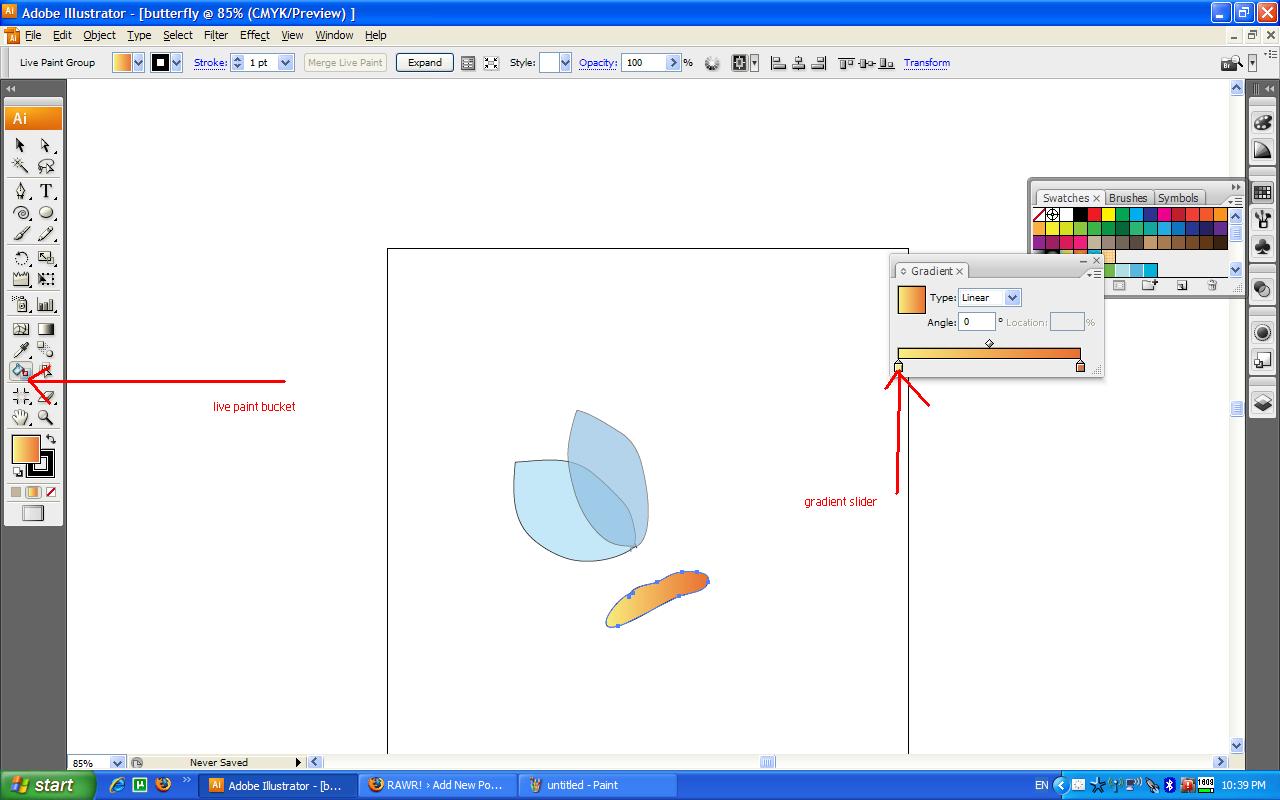
6. Using the selection tool (V), select all the paths

rainbow8

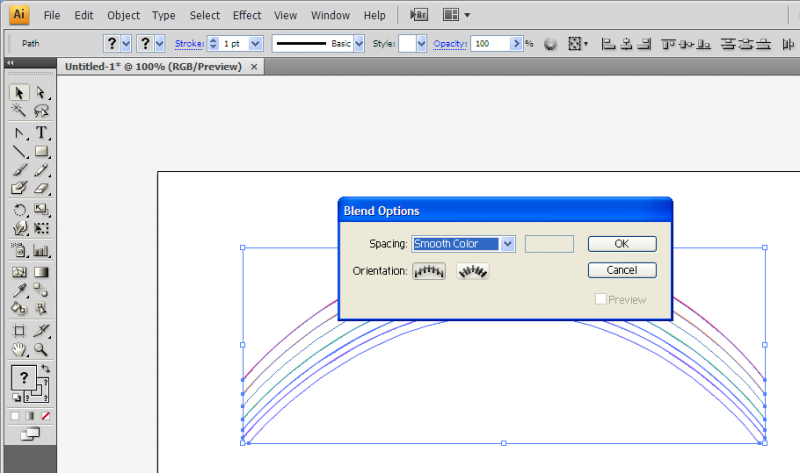
7. Next, go to Object>Blend>Blend options and choose smooth colour. Then, go to Object>Blend>Make (Alt+Ctrl+B)

rainbow

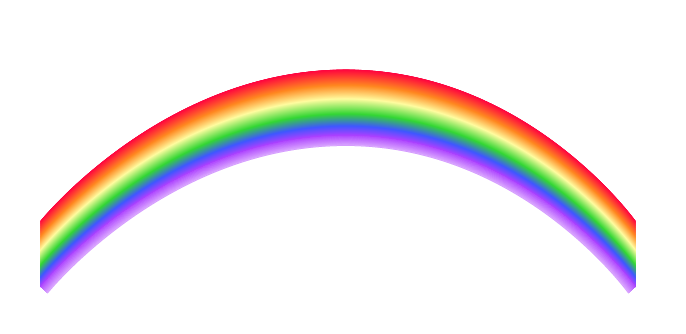
There you have it, your own rainbow!

Tutorial: How to draw a flower petal using Adobe Illustrator

This is a tutorial on how to draw a simple flower petal using Adobe Illustrator. I use Adobe Illustrator CS4, but most of the tools are the same in the earlier versions.

With the pen tool, draw a triangle. Join all the dots.

triangle

Then select the path with the selection tool (V) and clicking on swatch, select a gradient filled swatch to fill in the triangle. Illustrator is annoying in a way that it doesn't allow you to fill in a coloured gradient just by clicking on gradient.

gradient-filled swatch

Next, click on gradients (Window>Gradients). Select the linear gradient. I chose a light pink (double click on the square on the gradient bar to choose the colour) followed by a darker pink on the gradient bar. I then changed the angle of the gradient to -98 to that the light pink is at the tip of the triangle.

fillgradientcolour

Next by clicking on the curve handle tool, which is hidden under the pen tool (hold the click of the pen tool and choose the curve handle). I click on the anchor on the bottom left of the triangle and drag downwards. This would result in a curved path.

flowerpetal4

I then click on the right anchor and drag it upwards instead of downwards. You should adjust so that the petal shape that you want is achieved.

rightanchor

If the tip of the petal is too sharp, use the curve handle to change the shape. In the end, you get a petal that looks like this!

complete flower petal

You can do countless things with this. I duplicated it five times and rearranged it to look like a flower, or you can even duplicate it and rotate it around to achieve the image of falling petals.

complete flower

Tutorial: How to draw a simple butterfly logo using Adobe Illustrator

I opened up a new document in Illustrator and drew a basic wing shape using the Pencil tool. I adjust the wing shape by using the Direct Selection tool and double clicking on the path that I drew. I can then drag the lines to perfect my wing shape.

butterfly1

Then I filled it with a light blue colour with the Colour tool, and the border with black.

butterfly2

I drew a second wing shape with the Pencil tool again overlapping the first wing. This time I filled it with a darker blue.

butterfly3

I set the opacity on the transparency tool so that the backwing is visible

butterfly4

Next. again with the pencil tool, I draw a shape of the abdomen. This might not be perfect on the first try so I perfect it with the drag selection tool. Next I click on live paint bucket and make a live paint bucket from my selection of the abdomen. I then fill this in. I click on swatches and select an orange gradient. To change the degree of the gradient, I click on gradient (Window > Gradient) and drag the gradient slider around. To change colour I double click on the gradient slider which would bring me to the colour picker to choose a new colour.

butterfly5

Next I make the feelers. I make this with the Spiral tool hiding under the line segment tool. First I selected fill as black, and then the border as white. I then draw two spirals which I transform and edit to fit around the head.

butterfly6

Almost finished! The wing looks a bit dull so I add patterns with the brush tool. I select the shape I want and draw spirals in the wing.

Finished!, I can then save this as a symbol for future use.

butterfly7

flutterby