Easy Install nagios vshell on Centos

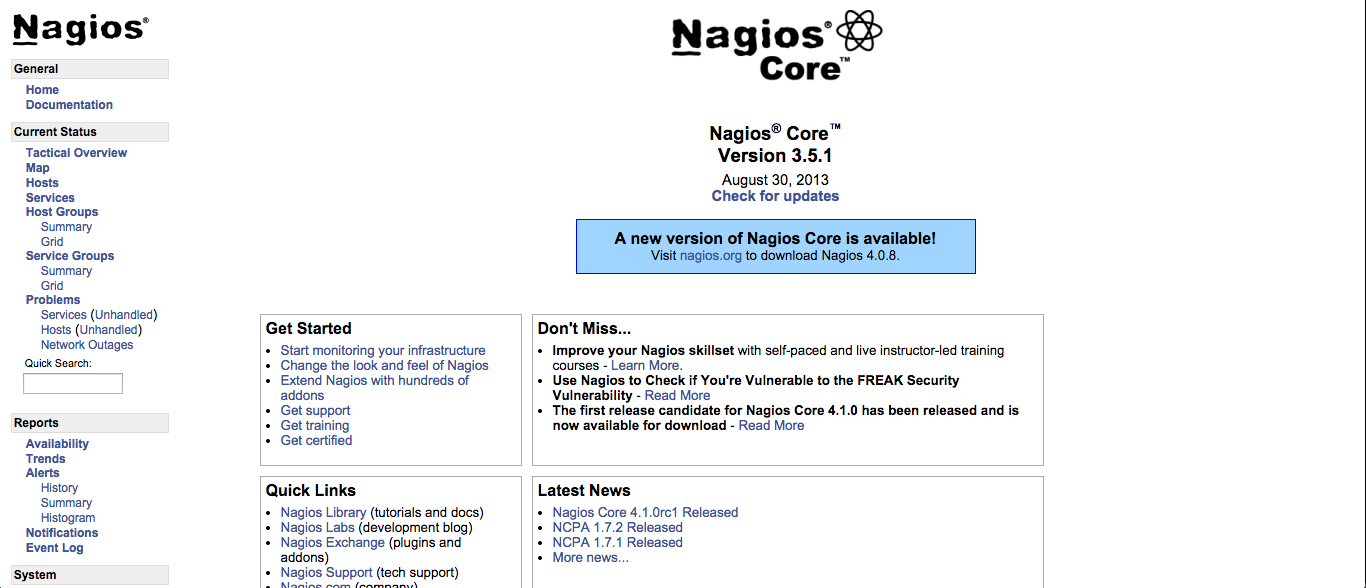
If you have setup your nagios on your server and you want to install vshell so that it looks better, just follow the guide here!

Download vShell

First thing you need to do is to download vshell

wget http://assets.nagios.com/downloads/exchange/nagiosvshell/vshell.tar.gz

you can do it anywhere as long as gets download

Install vShell

Now you need to install vshell

tar -zxvf vshell.tar.gz
cd vshell

Before you start installing, check your configuration

vi install.php

make sure that the path is correct

// ***********MODIFY THE DIRECTORY LOCATIONS BELOW TO MATCH YOUR NAGIOS INSTALL*********************

//target directory where vshell's web files will be stored  
define('TARGETDIR',"/usr/local/vshell");
//target directory where your current apache configuration directory is located
define('APACHECONF',"/etc/httpd/conf.d");
//default for ubuntu/debian installs 
//define('APACHECONF',"/etc/apache2/conf.d"); 

since i'm on centos and installed with apache, mine is by default correct! So all i did was installing this way

./install.php

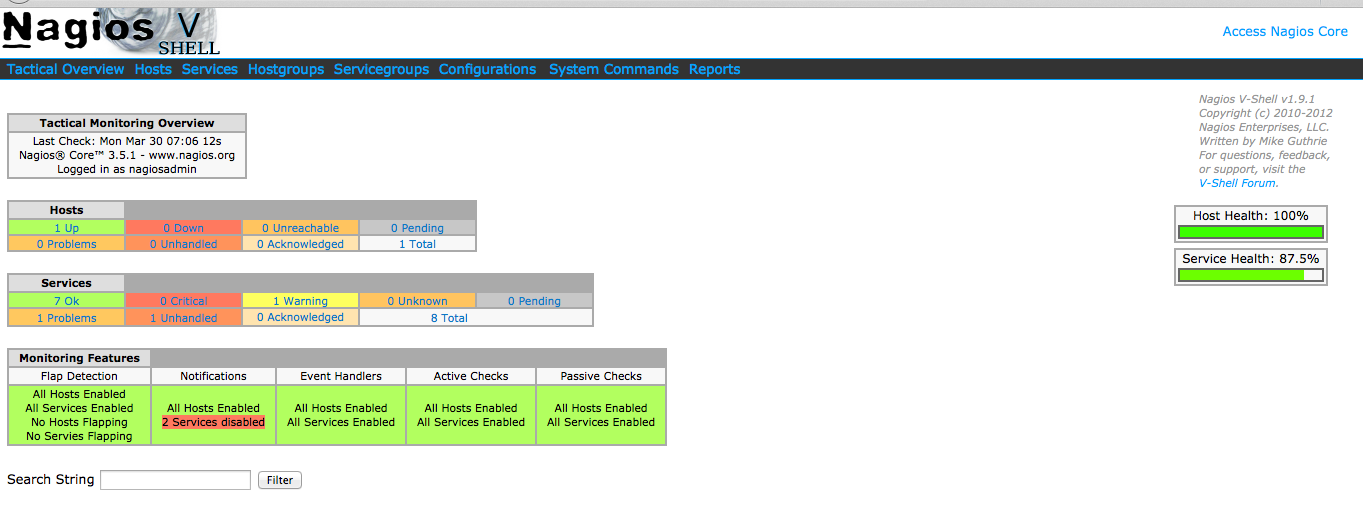
And done! you can access your vshell similar to nagios by typing http://localhost/vshell

Screen Shot 2015-03-30 at 7.06.43 PM

Important vShell path

There are a few things you need to know since everything above are quiet abstract.

/etc/httpd/conf.d/vshell.conf  #apache vshell setup
/etc/vshell.conf #vshell configuration

Now make sure that the vshell.conf file has the same as your nagios htpasswd.users or else you might not be able to login to vshell!

Troubleshooting

Once you done above, you might face a few problem like

Unable to login to vshell

Open up /etc/httpd/conf.d/vshell.conf and /etc/httpd/conf.d/nagios.conf
change your vshell.conf AuthUserFile to nagios.conf one
from

AuthUserFile /user/local/nagios/passwd

to

AuthUserFile /etc/nagios/passwd

above might vary but keep that in mind.

Unable to open '/usr/local/nagios/var/objects.cache' file!

Once you login you see the above error and you might want to open up the file /etc/vshell.conf and /etc/nagios/nagios.cfg and change vshell.conf from

; Full filesystem path to the Nagios object cache file
OBJECTSFILE = "/usr/local/nagios/var/objects.cache"

to

; Full filesystem path to the Nagios object cache file
OBJECTSFILE = "/var/log/nagios/objects.cache"

where the correct value should be the same as nagios one

Unable to open '/usr/local/nagios/var/status.dat' file!

Once you login you see the above error and you might want to open up the file /etc/vshell.conf and /etc/nagios/nagios.cfg and change vshell.conf from

; Full filesystem path to the Nagios status file
STATUSFILE = "/usr/local/nagios/var/status.dat"

to

; Full filesystem path to the Nagios status file
STATUSFILE = "/var/log/nagios/status.dat"

where the correct value should be the same as nagios one

Unable to open '/usr/local/nagios/etc/cgi.cfg' file!

Once you login you see the above error and you might want to open up the file /etc/vshell.conf and /etc/nagios/nagios.cfg and change vshell.conf from

; Full filesystem path to the Nagios CGI permissions configuration file
CGICFG = "/usr/local/nagios/etc/cgi.cfg"

to

; Full filesystem path to the Nagios CGI permissions configuration file
CGICFG = "/etc/nagios/cgi.cfg"

where the correct value should be the same as nagios one

Easy Install Nagios in Centos 6 via yum

Ok, i used to write the longer version when i was still using Centos 5, recently i went back to the article and found out that there is actually a shorter way to setup EVERYTHING. So here i am writing a shorter version to setup nagios on centos 6.

Setup Nagios Server

This is the server that will have vshell and nagios web interface. All you have to do is to install epel-release for your centos

yum install -y epel-release

and starts install nagios via yum

yum install -y nagios nagios-devel nagios-plugins* gd gd-devel httpd php gcc glibc glibc-common openssl

Now we need to make sure nagiosadmin is our username and password is set

htpasswd -c /etc/nagios/passwd nagiosadmin

which you can setup all the configuration at /etc/nagios/cgi.cfg and if you would like to change the configuration on apache, it is located at /etc/httpd/conf.d/nagios.conf

Once you have installed nagios, remember to startup nagios and apache whenever you restart!

service httpd restart
chkconfig httpd on

service nagios restart
chkconfig nagios on

and you can access it via http://localhost/nagios with username and password you have just setup above!!! Pretty easy ya!

Screen Shot 2015-03-30 at 6.38.04 PM

Now you might want to install nrpe on each server you wish to monitor next,

Installing nrpe with nagios-plugins on each server

Now, you really want to just have all these in yum when you have like 20 servers? It will be a nightmare if you just build all these by source (which i did last time instead of writing a scripts, yeah i'm dumb, i know). All you need to do via yum is

yum install nrpe nagios-plugins-all

And configure nrpe via

vi /etc/nagios/nrpe.cfg

adding your nagios ip into it so that your nagios server is allowed to penetrate each 'slave' you have lol.

allowed_hosts=127.0.0.1, 192.168.1.110

Now all you need to do is to setup all the services you wish to let your man to do on your 'slaves'.

command[check_users]=/usr/lib64/nagios/plugins/check_users -w 5 -c 10
command[check_load]=/usr/lib64/nagios/plugins/check_load -w 15,10,5 -c 30,25,20
command[check_hda1]=/usr/lib64/nagios/plugins/check_disk -w 20% -c 10% -p /dev/hda1
command[check_zombie_procs]=/usr/lib64/nagios/plugins/check_procs -w 5 -c 10 -s Z
command[check_total_procs]=/usr/lib64/nagios/plugins/check_procs -w 150 -c 200 

and these can be setup at the same path as /etc/nagios/nrpe.cfg and you should be able to add more 'action' to it if you want.

and remember to setup nrpe to run on startup

service nrpe start
chkconfig nrpe on

Setup OpenVZ NFS Server on Centos

i though i writing this down how i setup my own openvz nfs server container to serve as a NFS server. Installing it is pretty easy until a lot of errors start popping out when you try to start your openvz, so i though of just writing them down just in case.

To install openvz nfs server, all you need to do is

yum install nfs* -y

and all nfs library will be installed into your container. Next start everything!

 service rpcbind start
 chkconfig rpcbind on
 service nfs start
 chkconfig nfs on

And this is what i get,

Starting NFS services:                                     [  OK  ]
Starting NFS quotas:                                       [  OK  ]
Starting NFS mountd:                                       [  OK  ]
Starting NFS daemon: rpc.nfsd: Unable to access /proc/fs/nfsd errno 2 (No such file or directory).
Please try, as root, 'mount -t nfsd nfsd /proc/fs/nfsd' and then restart rpc.nfsd to correct the problem
                                                           [FAILED]

not too smooth journey as i though!

Different type of NFS errors

So there are a few kind of errors you will see when setting up an NFS server on Openvz container and you can see them on openvz.org NFS server article,

My issue was apparent this one,

If you see this:

# service nfs start
....
Starting NFS daemon: rpc.nfsd: Unable to access /proc/fs/nfsd errno 2 (No such file or directory).
Please try, as root, 'mount -t nfsd nfsd /proc/fs/nfsd' and then restart rpc.nfsd to correct the problem
                                                           [FAILED]
# mount -t nfsd nfsd /proc/fs/nfsd
mount: unknown filesystem type 'nfsd'
It means you haven't loaded nfsd kernel module on host before starting container.

Well...this means that i need to do more things!

Kernel NFS server

Kernel-space NFS server is supported by latest RHEL5 and RHEL6 based kernels and since vzctl-3.0.24. But currently only NFSv3 is supported - no NFSv4 support yet. More info here: http://forum.openvz.org/index.php?t=msg&goto=46174&. NFSv3 is notorious for leaving hanging file locks and in my opinion NFSv3 should not be used in file intensive setups. So that's the thing i will need to live with for the time being.

NFS Openvz Prerequisites

In order to run an NFS server inside a container, make sure:

  • nfsd kernel module is loaded on host system before starting a container
  • nfsd feature for a container is turned on

Setup

  • Make sure that rpcbind service is started before nfs service:
chkconfig rpcbind on && service rpcbind start
  • Disable NFSv4 and nfsd module loading warnings in /etc/sysconfig/nfs by uncommenting the following lines:
MOUNTD_NFS_V3="yes"
RPCNFSDARGS="-N 4"
NFSD_MODULE="noload"
  • Start NFS service:
chkconfig nfs on && service nfs start

Host node

Once you done that, remember to activate NFS inside a container issue the command below

vzctl set $CTID --feature nfsd:on --save

and ensure modules nfs and nfsd is loaded:

modprobe nfsd
modprobe nfs

All you left to do is to start your container and see whether the error is eliminated. If its still doesn't work, check out this forum thread where most of the information above are retrieved (credit goes to them).

*****UPDATE******

Opps, i forget. On /etc/exports u need to state the directory that you want people to be able to use your nfs to mount their machine on, in my case it's /mnt/nfs so i did this,

mkdir -p /mnt/nfs

then on /etc/exports i did this

/mnt/nfs     192.168.0.0/24(rw,no_root_squash,no_subtree_check,fsid=0)

take note that 192.168.0.0/24 is the range of ip that will mount my nfs directory.

Firewall Host

After everything is done up there, just remember to update your firewall to allow nfs port to your nfs server. On the path /etc/sysconfig/nfs open it up and update all the path and uncomment LOCKD_TCPPORT, MOUNTD_PORT, STATD_PORT and LOCKD_UDPPORT and allow the port as written below, ( and you will notice this is done on a Centos machine)

  1. Allow TCP and UDP port 2049 for NFS.
  2. Allow TCP and UDP port 111 (rpcbind/sunrpc).
  3. Allow the TCP and UDP port specified with MOUNTD_PORT="port"
  4. Allow the TCP and UDP port specified with STATD_PORT="port"
  5. Allow the TCP port specified with LOCKD_TCPPORT="port"
  6. Allow the UDP port specified with LOCKD_UDPPORT="p

and in case you need the iptables command, here you go, and you are welcome

-A PREROUTING -d 10.6.25.101/32 -i vmbr0 -p tcp -m tcp --dport 2925 -j DNAT --to-destination 192.168.0.111:22
-A PREROUTING -d 10.6.25.101/32 -i vmbr1 -p tcp -m tcp --dport 32803 -j DNAT --to-destination 192.168.0.111:32803
-A PREROUTING -d 10.6.25.101/32 -i vmbr1 -p tcp -m tcp --dport 892 -j DNAT --to-destination 192.168.0.111:892
-A PREROUTING -d 10.6.25.101/32 -i vmbr1 -p tcp -m tcp --dport 662 -j DNAT --to-destination 192.168.0.111:662
-A PREROUTING -d 10.6.25.101/32 -i vmbr1 -p tcp -m tcp --dport 2049 -j DNAT --to-destination 192.168.0.111:2049
-A PREROUTING -d 10.6.25.101/32 -i vmbr1 -p tcp -m tcp --dport 111 -j DNAT --to-destination 192.168.0.111:111
-A PREROUTING -d 10.6.25.101/32 -i vmbr1 -p udp -m udp --dport 892 -j DNAT --to-destination 192.168.0.111:892
-A PREROUTING -d 10.6.25.101/32 -i vmbr1 -p udp -m udp --dport 662 -j DNAT --to-destination 192.168.0.111:662
-A PREROUTING -d 10.6.25.101/32 -i vmbr1 -p udp -m udp --dport 111 -j DNAT --to-destination 192.168.0.111:111
-A PREROUTING -d 10.6.25.101/32 -i vmbr1 -p udp -m udp --dport 2049 -j DNAT --to-destination 192.168.0.111:2049
-A PREROUTING -d 10.6.25.101/32 -i vmbr1 -p udp -m udp --dport 32769 -j DNAT --to-destination 192.168.0.111:32769
-A PREROUTING -d 10.6.25.101/32 -i vmbr1 -p tcp -m tcp --dport 8000 -j DNAT --to-destination 192.168.0.111:8000

just port forwarding for both up and tcp 😉

and remember to open up all the port at /etc/sysconfig/nfs

#
# Define which protocol versions mountd
# will advertise. The values are "no" or "yes"
# with yes being the default
#MOUNTD_NFS_V2="no"
MOUNTD_NFS_V3="yes"
#
#
# Path to remote quota server. See rquotad(8)
#RQUOTAD="/usr/sbin/rpc.rquotad"
# Port rquotad should listen on.
#RQUOTAD_PORT=875
# Optinal options passed to rquotad
#RPCRQUOTADOPTS=""
#
#
# Optional arguments passed to in-kernel lockd
#LOCKDARG=
# TCP port rpc.lockd should listen on.
LOCKD_TCPPORT=32803
# UDP port rpc.lockd should listen on.
LOCKD_UDPPORT=32769
#
#
# Optional arguments passed to rpc.nfsd. See rpc.nfsd(8)
# Turn off v2 and v3 protocol support
#RPCNFSDARGS="-N 2 -N 3"
# Turn off v4 protocol support
RPCNFSDARGS="-N 4"
# Number of nfs server processes to be started.
# The default is 8.
#RPCNFSDCOUNT=8
# Stop the nfsd module from being pre-loaded
NFSD_MODULE="noload"
# Set V4 and NLM grace periods in seconds
#
# Warning, NFSD_V4_GRACE should not be less than
# NFSD_V4_LEASE was on the previous boot.
#
# To make NFSD_V4_GRACE shorter, with active v4 clients,
# first make NFSD_V4_LEASE shorter, then restart server.
# This will make the clients aware of the new value.
# Then NFSD_V4_GRACE can be decreased with another restart.
#
# When there are no active clients, changing these values
# can be done in a single server restart.
#
#NFSD_V4_GRACE=90
#NFSD_V4_LEASE=90
#NLM_GRACE_PERIOD=90
#
#
#
# Optional arguments passed to rpc.mountd. See rpc.mountd(8)
#RPCMOUNTDOPTS=""
# Port rpc.mountd should listen on.
MOUNTD_PORT=892
#
#
# Optional arguments passed to rpc.statd. See rpc.statd(8)
#STATDARG=""
# Port rpc.statd should listen on.
STATD_PORT=662
# Outgoing port statd should used. The default is port
# is random
#STATD_OUTGOING_PORT=2020
# Specify callout program
#STATD_HA_CALLOUT="/usr/local/bin/foo"
#
#
# Optional arguments passed to rpc.idmapd. See rpc.idmapd(8)
#RPCIDMAPDARGS=""
#
# Set to turn on Secure NFS mounts.
#SECURE_NFS="yes"
# Optional arguments passed to rpc.gssd. See rpc.gssd(8)
#RPCGSSDARGS=""
# Optional arguments passed to rpc.svcgssd. See rpc.svcgssd(8)
#RPCSVCGSSDARGS=""
#
# To enable RDMA support on the server by setting this to
# the port the server should listen on
#RDMA_PORT=20049

Firewall Guest

Remember to turn off or allow those port to your guest as well if you are on Centos.

chkconfig iptables off
service iptables stop

i prefer to off it entirely.

Appendix

  • https://www.howtoforge.com/setting-up-an-nfs-server-and-client-on-centos-6.3
  • http://forum.proxmox.com/threads/9509-NFS-inside-OpenVZ-container
  • http://www.unixmen.com/nfs-server-installation-and-configuration-in-centos-6-3-rhel-6-3-and-scientific-linux-6-3/
  • https://openvz.org/NFS_server_inside_container
  • http://www.linuxquestions.org/questions/linux-server-73/nfs-share-setup-issue-mountd-refused-mount-request-unmatched-host-924105/
  • https://access.redhat.com/documentation/en-US/Red_Hat_Enterprise_Linux/6/html/Storage_Administration_Guide/s2-nfs-nfs-firewall-config.html

How to setup Internet on Openvz container with Private IP

Ok, so i don't want to waste my IP addresses so i would need to setup multiple openvz container with private ip with a single host public ip. If you did read the article on openvz.org about using NAT for container with private IPs, but you were unable to setup properly or your internet isn't going into your container, this is most likely due to a setup issue you have (which is what happen to me and this is why i am writing this up!)

Assuming i have 3 container with the following ips (please setup these ips on your containers)

vps1.hungred.com 192.168.0.1
vps2.hungred.com 192.168.0.2
vps3.hungred.com 192.168.0.2

and a single public ip host machine that all these 3 containers sites on with the following ip

vps.hungred.com 10.2.5.1

i am going to setup and explain what is going to be done with the above machines.

OpenVZ Host

Most of the work, or to be exact, all of the work will need to be done on the Openvz Host machine in this case its the machine with the ip 10.2.5.1. Make sure the following things are done on your host machine,

IP forwarding should be turned on on the hardware node in order for container networking to work. Make sure it is turned on:

$ cat /proc/sys/net/ipv4/ip_forward
1
Output should be '1'. If it is '0', enable IP forwarding as it is described in Quick installation#sysctl.

NOTE: Ubuntu made some changes to the syntax for NAT. See this link if you are needing to enable NAT on an Ubuntu host :

Launchpad

The syntax of /etc/sysctl.conf has changed to :

net.ipv4.conf.default.forwarding=1
net.ipv4.conf.all.forwarding=1

Once the above are done, it's time to setup our iptables to forward all internet traffic to our containers. All you need to do are to setup the iptables with the range of ips needed to forward to.

To enable the containers, which have only internal IP addresses, to access the Internet, SNAT (Source Network Address Translation, also known as IP masquerading) should be configured on the Hardware Node. This is ensured by the standard Linux iptables utility. To perform a simple SNAT setup, execute the following command on the Hardware Node:

# iptables -t nat -A POSTROUTING -s src_net -o eth0 -j SNAT --to ip_address
where src_net is a range of IP addresses of containers to be translated by SNAT, and ip_address is the external IP address of your Hardware Node. The format of src_net is xx.xx.xx.xx/xx (CIDR notation). For example:

# iptables -t nat -A POSTROUTING -s 192.168.2.0/24 -o eth0 -j SNAT --to ip_address
Multiple rules are allowed, for example, in case you wish to specify several ranges of IP addresses. If you are using a number of physical network interfaces on the Node, you may need to specify a different interface for outgoing connections, e.g. -o eth2.

To make all IP addresses to be translated by SNAT (not only the ones of containers with private addresses), you should type the following string:

# iptables -t nat -A POSTROUTING -o eth0 -j SNAT --to ip_address

Let me explain a little bit on what is really needed, you will really want to enter the below statement

iptables -t nat -A POSTROUTING -s 192.168.0.0/24 -o eth0 -j SNAT --to 10.2.5.1

what the above does is to tell your iptables to allow all private ip of the range 192.168.0.1-192.168.254 to be connect to the internet at 10.2.5.1 but bear in mind what ethernet port you are using, it can be eth0 or vmbr01 depending what you have setup your 10.2.5.1 on. Just firing up ifconfig and you should see where 10.2.5.1 are being attached to.

and also, while you are still at it, do setup your firewall as well.

Firewall
For Debian hardware node, you may need to allow a forward rule. The table still being the default table (filter) but the chain is FORWARD:

# iptables -A FORWARD -s 192.168.0.0/24 -j ACCEPT
# iptables -A FORWARD -d 192.168.0.0/24 -j ACCEPT
For default RedHat/CentOS firewall, allow outgoing connections from your containers, for example:

# iptables -A RH-Firewall-1-INPUT -s 192.168.0.0/24 -j ACCEPT
# iptables-save > /etc/sysconfig/iptables
# service iptables restart

The above forward all internet and accept connection from the range of 192.168.0.1-192.168.254 due to /24 being accepted.

Once you are done with the above, test it out

Test
Now you should be able to reach internet from your container:

# vzctl exec $CTID ping openvz.org

where $CTID is the openvz id

if you don't get unknown host, and get a response back, you have just setup your machine with an internal ip!

Easy Resize Linux KVM on Proxmox VE 3.3

Ok, i lied, there is no easy way to resize kvm but it's pretty fast if you know what you are doing. Finding Proxmox VE resources isn't very easy since not many people are actually writing this to share their knowledge across. I figured that i should write down how i resize my KVM environment on a Centos 6.6 environment that i have for a KVM vm to better illustrate how this can be done quickly

Requirement

Before i start let me explain what you need to have on your hard disk setup within your Linux VM environment. Your harddisk must be setup with LVM also known as logical volume manager. At least this is how i setup my hard disk, if not, you will need to do a huge around of crap just to resize your KVM environment.

Reszing linux KVM

On Proxmox, it's pretty simple, if you want to resize a particular VM, just click on it and hit on "Hardware" as shown below,

Screen Shot 2014-12-01 at 10.12.30 AM

Make sure your VM is off and hit on 'Resize disk' and this will pop out.

Screen Shot 2014-12-01 at 10.14.23 AM

And you will notice that nothing happens! Ha ha! Just Kidding! but seriously, nothing will happen if you start your vm and look at your machine size but still, start your VM. And hit on

<pre class="brush: php; title: ; notranslate" title="">
df -kh

and you will see my initial hard disk space

Screen Shot 2014-12-01 at 10.20.13 AM

45G is my initial hard disk space and /dev/mapper/VolGroup-lv_root is my logical volume. Now, before i go crazy, i need to check whether the 10G that i just added is indeed in my machine. I can do this by hitting

<pre class="brush: php; title: ; notranslate" title="">
fdisk -l

and you will see the following

Screen Shot 2014-12-01 at 10.24.53 AM

which indicate that my 10GB has been added into the machine (eh, yeah i have 50GB and now i added 10GB so i should have 60GB) and do take note of my drive name '/dev/vda'

Partitioning the new disk

We want to create a new partition by using the disk utility below,

<pre class="brush: php; title: ; notranslate" title="">
fdisk /dev/vda

which will provide you with an interactive console, that you will use to create the partition.
Enter the commands in the following sequence:

<pre class="brush: php; title: ; notranslate" title="">

Command (m for help): n

Command action
   e   extended
   p   primary partition (1-4)
p

Partition number (1-4): 4

First cylinder (1-1305, default 1): 1

Last cylinder, +cylinders or +size{K,M,G} (1-1305, default 1305): +9500M

Command (m for help): w

Since i have partition number 1-3, so i create 4 and from there on, just use the First cylinder default and last cylinder would be the number of size i am going to add, in this case, it is 9.5G as 0.5G just got suck off somewhere.

Now executing the following will show you that our changes have been made to the disk:

<pre class="brush: php; title: ; notranslate" title="">
fdisk -l /dev/vda

Now, you will see the following new partition below,

Screen Shot 2014-12-01 at 10.36.41 AM

staring at partition 4, you will see the new 9500G partition (but do not delete partition to create the new drive, you will most likely see hell), now you will need to reboot your VM!

Initializing the new partition for use with LVM

Once you have rebooted your vm, we should have a new partition, lets initialize it for use with LVM by

<pre class="brush: php; title: ; notranslate" title="">
pvcreate /dev/vda4

once this is done, you will get the following message

<pre class="brush: php; title: ; notranslate" title="">
Physical volume "/dev/vda4" successfully created

Now, if you hit

<pre class="brush: php; title: ; notranslate" title="">
vgs

it will display the volume group details and if u click on

<pre class="brush: php; title: ; notranslate" title="">
lvs

it will display the logical volume details. These is needed for you to find out where your root partition is located.

Extending logical volumne

Now, to extend the logical volume, we will hit below,

<pre class="brush: php; title: ; notranslate" title="">
vgextend VolGroup /dev/vda4

This will add the new disk/partition to our intended volume group “VolGroup”. Double-check by hitting the following command,

<pre class="brush: php; title: ; notranslate" title="">
vgdisplay

and it should display the group name "VolGroup" with other new parameters, including the number of free PE (physical extents). Now we can increase the size of the logical volume our root partition is on as shown below,

Screen Shot 2014-12-01 at 10.20.13 AM

by using the command,

<pre class="brush: php; title: ; notranslate" title="">
lvextend -L +9.5G /dev/mapper/VolGroup-lv_root

We are almost done now: we just need to tell the guest that the root partition has increased in size, and this can be done live since we are doing this using lvm! Now, we will resize the logical volume by doing this,

<pre class="brush: php; title: ; notranslate" title="">
resize2fs /dev/mapper/VolGroup-lv_root

And if you are using Centos 7, try the following instead,

<pre class="brush: php; title: ; notranslate" title="">
xfs_growfs /dev/mapper/VolGroup-lv_root

And we are done! Now, check it out at

<pre class="brush: php; title: ; notranslate" title="">
df -kh

and our kvm has been resized!